MK2 Produktseite EN2023-11-08T11:19:26+01:00

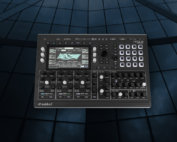
The legendary synthesizer technology of the Waldorf Quantum – now with new features.

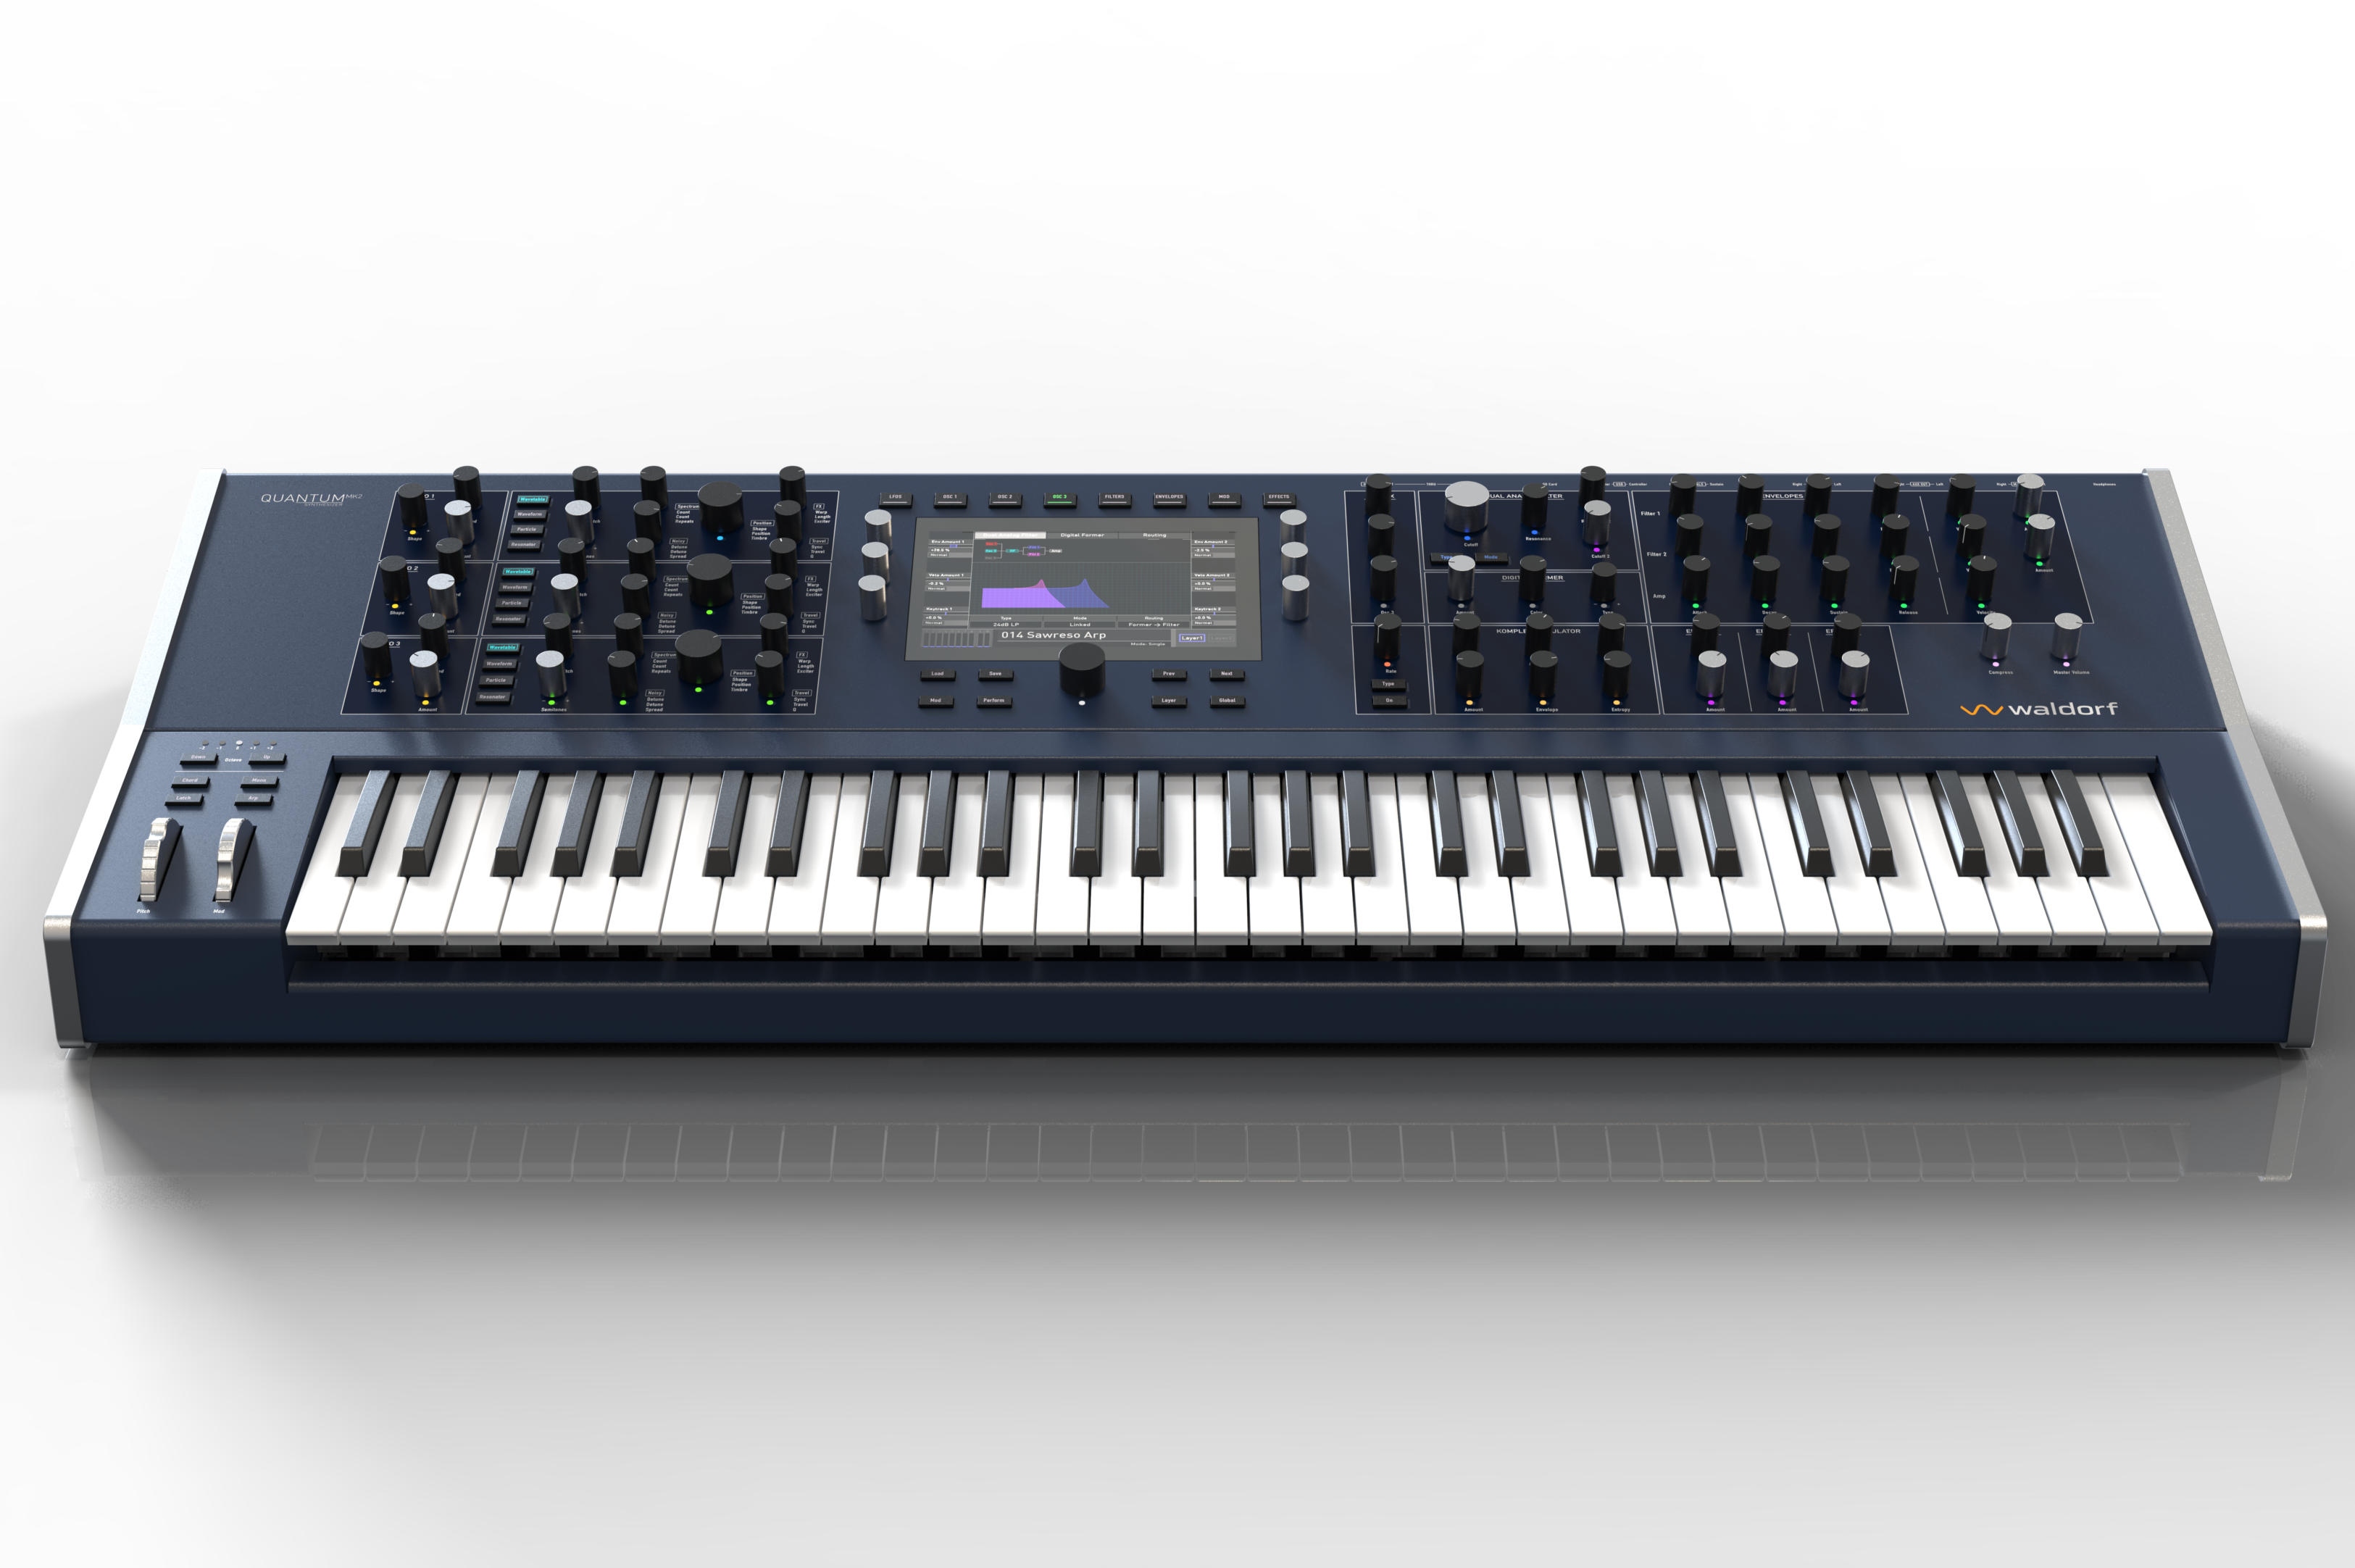
As with the Iridium keyboard, the Quantum MK2 now also features a new FATAR TP/8SK keyboard with 61 semi-weighted keys and polyphonic aftertouch.

While monophonic aftertouch makes all played notes respond in the same way, polyphonic aftertouch provides specific modulation of individual notes.

For example, the behavior of the envelopes or the oscillator pitch can be modulated very sensitive, which offers a completely new range of expression.

The internal flash memory for samples storage has also been expanded to 59GB.

The flexibility emanating from Quantum’s powerful oscillators and their interaction with one another is simply breath-taking. Never before has it ever been possible to create such a wide sonic bandwidth with one synthesizer. Stretching from classic analog, with precise sample playback, through to harsh or animated digital sounds, escalating all the way up to sound and sequence clusters, that can only be achieved with a huge modular synthesizer system or modern plug-ins.

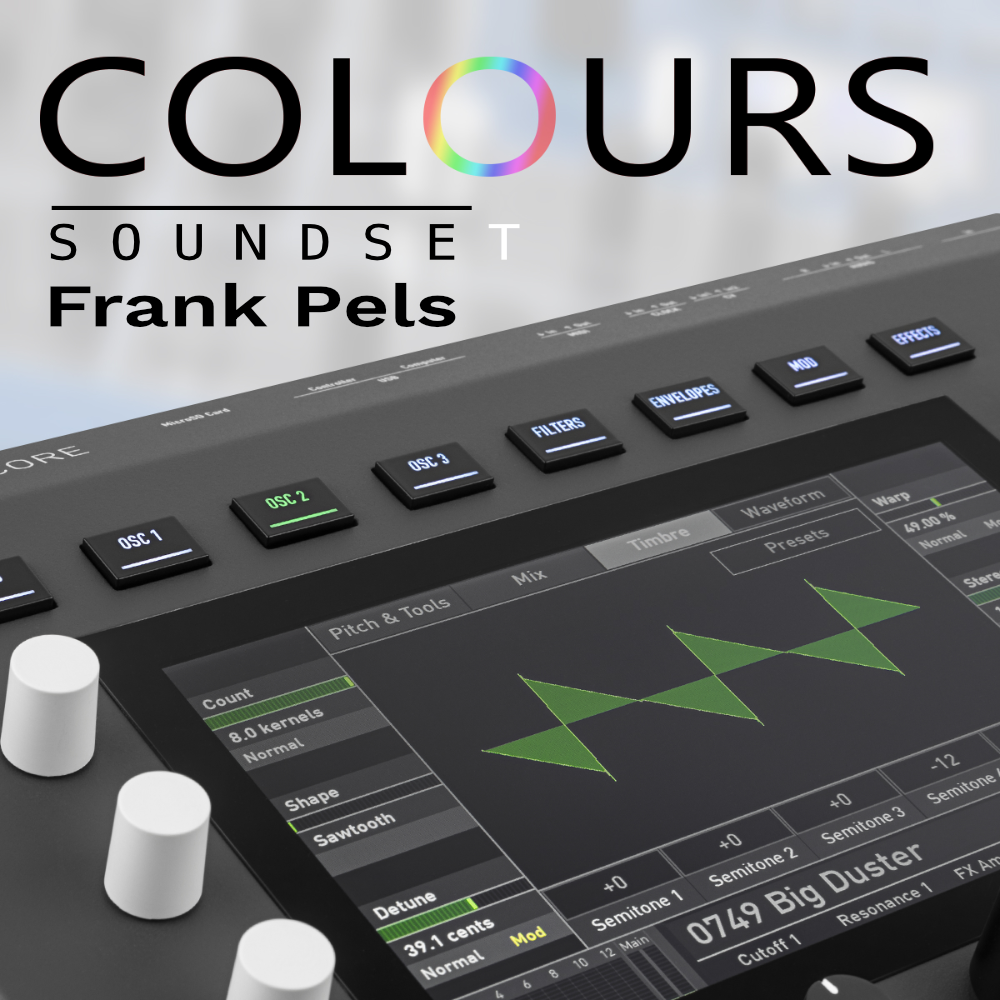
Its 3 Oscillators offer five synthesis algorithms each:

• Waldorf-style Wavetables with the latest additions from Nave, including speech synthesis and wavetable generation from audio samples

• Classic Synthesizer Waveforms with multiple waves for an ultra fat sound right out of the oscillators

• Granular Sampler with multi sampling plus traditional sampling mode

• Resonator for virtual sound sculpting

• New Kernel synthesis with possibilities from classic 6 operator FM to innovative audio rate wavetable modulations

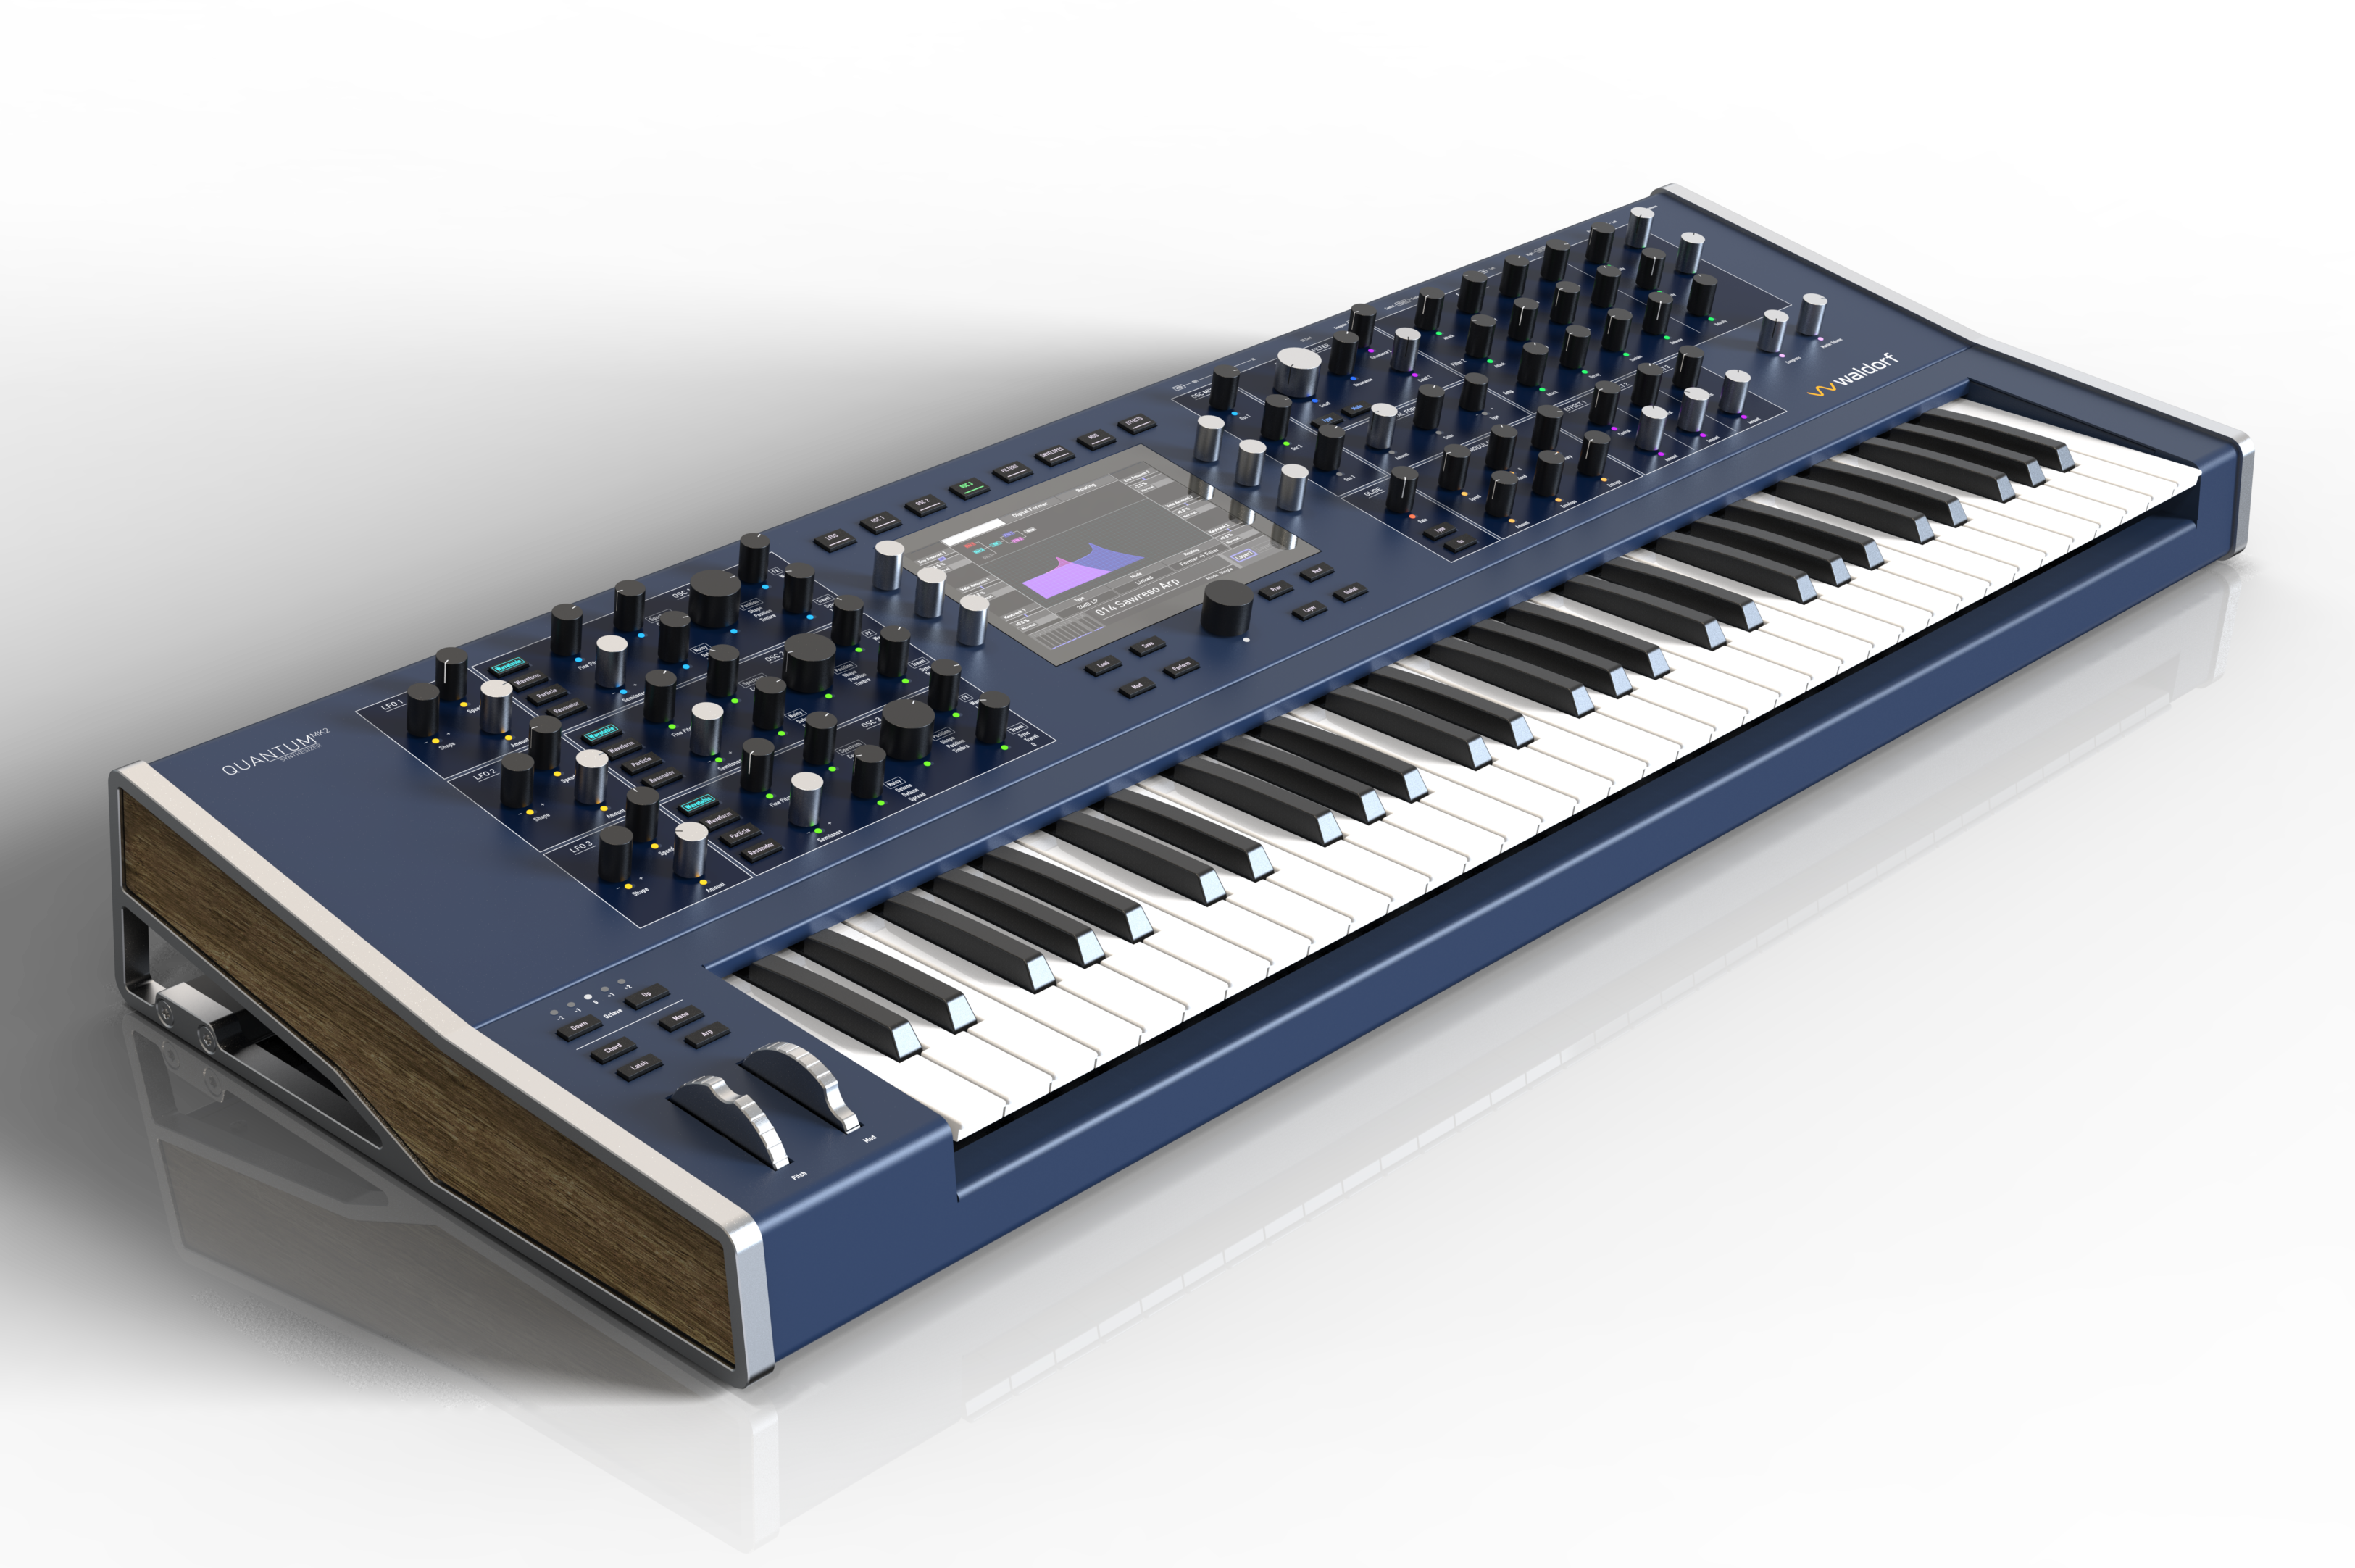
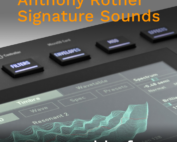
Quantum’s beautiful ergonomic and intuitive user panel supports an artist’s workflow with a previously unknown elegance. The carefully crafted array of aluminium knobs and encoders surround a high-resolution multi touch display. Waldorf engineers spent many long hours perfecting the interaction between the display and the physical control elements. The stunning display is a highly flexible extension of the tactile experience, and is light-years ahead of any synthesizer currently on the market today.

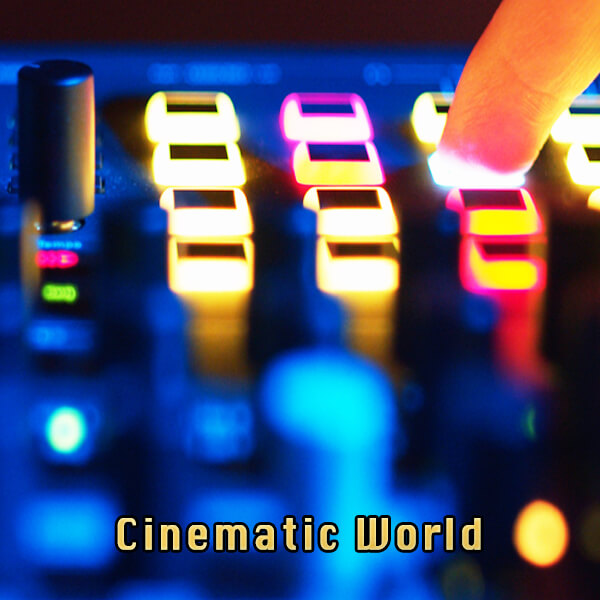
To help understand functional correlations between one knob and another, each control knob is individually illuminated by a multi color LED. This makes it instantly obvious when viewing complex settings and modulation settings, where related parameters can be adjusted quickly and efficiently. With the help once again of the gorgeous central display, precise settings can be handled with ease, much the same as the experience when using your cutting edge computer tablet.

When Waldorf decided to develop Quantum, little did they realize it would take several years of painstaking work. There were areas of Quantum that our years of experience with sound generation were bought to the fore. But Quantum is so powerful it took us into uncharted territory, involving both sound and the way it was felt the musician would interact with it.

Quantum was designed and developed in Germany. All essential components have been designed, manufactured and assembled here in Germany and Italy. This has allowed us to manufacture Quantum with an unparalleled build quality. We would also like to take this opportunity to thank a world class array of sound designers that have contributed to a multi-facetted factory sound set:

Richard Devine, Howard Scarr, Reinhold Heil, BT, Matt Johnson, Joerg Huettner, Kevin Schroeder, Sascha Dikiciyan, Kurt Ader, Mike Huckaby, Thorsten Quaeschning u.v.m.

Quantum

Specifications

Specifications

  • Hybrid Digital/Analog Polyphonic Synthesizer
  • 61 Keys high-quality Fatar TP/8SK keyboard, polyphonic aftertouch
  • 8 voices with analog filter, up to 16 voices with digital filters
  • Dual timbral: split or layered mode with separate stereo audio outputs
  • 3 stereo digital oscillators each capable of five synthesis algorithms
  • Wavetable: Waldorf style with latest additions from Nave including speech synthesis, wavetable generation from audio and new features
  • Waveform: Waveform with up to 8 simultaneous waves per Oscillator in detuned or chordal mode with hard-sync, warp & PWM as well as tunable noise
  • Particle: Sampler in traditional and granular mode using multi-samples or live input
  • Resonator: Exciter using multi-sampling plus filter bank sound model.
  • New Kernel synthesis with possibilities from classic 6 operator FM to innovative audio rate wavetable modulations
  • Two analogue lowpass filters per voice each in 24 or 12 dB configuration using innovative link modes, or alternatively two digital multi-mode filters
  • Digital former: Additional digital algorithms per voice like comb filter, high-pass, band-pass & notch filters (Nave, Largo or PPG models), bit-crusher, drive and more
  • Flexible routing system for order of filters & digital former and individual oscillator routings
  • 6 LFOs in poly and global mode with extensive parameter set
  • 6 loopable envelopes
  • Komplex: multistage LFO/envelope modulator
  • Extensive modulation matrix with 40 slots and easy via-controller assignments
  • Intuitive modulation assignment via panel elements and control LEDs
  • Master effect rack of 5 slots for each timbre choosing from FX like phaser, flanger, chorus, reverb, drive, eq and more.
  • Compressor for main output
  • Step sequencer with step recording, parameter automation and scale-based pitch quantization
  • Microtonal pitch configurations capable of importing Skala scl files
  • Capable of polyphonic aftertouch via internal keybed or external MIDI inputs
  • Chord and latch buttons
  • Unisono mode
  • Module-based preset system for effects, oscillators, step-sequenzer and Komplex modulator
  • Single-function potentiometer and encoder controls for intuitive editing
  • Visualisation and deeper sound editing via context-sensitive high-resolution capacitive multi-touch display
  • Spectrum Analyzer and Oscilloscope at various processing stages
  • Up to 10,000 sound patch capacity organized by banks, attributes, author and patch number.
  • Favourites lists for quick recall of sound patches like for set-lists etc.
  • Pre-loaded with wide variety of patches by acclaimed sound designers
  • MIDI output of local keyboard, wheels and assignable panel elements
  • Automation of sound parameters from MIDI inputs via MIDI CC learn function
  • Recording of samples from audio inputs or self-recording of audio outputs
  • 4 GB*) internal Flash memory for presets and wavetables, 59GB internal sample storage
  • Pre-loaded with approx. 2 GB sample data
  • On board audio file editor
  • Export & import of presets, sample & wavetable via SD card or USB drive
  • Import of Nave presets and selected legacy FM .syx files
  • Mod wheel can be assigned to any parameter which can be modulated in the matrix or via quick assign
  • Pitch wheel can be assigned to each oscillator individually
  • Weight: 17.8kg
  • Dimensions: 1006 x 401 x 131 mm

Sampling capabilities

Each of the 3 Oscillators of a single timbre can be used in one of three modes using samples:

  • Stereo Multi-Sampler with looping and reverse playback
  • Granular Sampler with extensive parameter set
  • Resonator model using sampler as exciter
  • Samples are organized using key and velocity maps, selections rules like round robin, random etc., and individual pitch, gain and pan settings.
  • Samples are stored in internal Flash memory of 59GB capacity pre-filled with 2GB specially made for Quantum factory samples.
  • New samples can be recorded from external stereo audio inputs, or from self-recording Quantums own engine.
    Samples can also be imported an stored to internal Flash via SD card or USB drive using WAV and AIFF file format (44.1kHz sample rate).
  • The Quantum allows for a huge range of sample-based sound design capabilities from classical synths sounds to uncharted territories.
  • It’s worth noting that the sample use in the Quantum is always within a synthesizer’s sonic context, and it is not meant to work as a “bread and butter” sample keyboard to play back like traditional sampling instruments nor third party libraries.

Huge range of arpeggiator parameters:

  • 7 Algorithms to choose from like up, down, random etc.
  • Octave range
  • 7 Sort Orders
  • 3 Velocity Modes
  • Gate length
  • Swing
  • BPM
  • Beat Division
  • Rhythmic patterns
  • Reset Modes
  • Keyboard Latch chordal and non-chordal

If that’s not enough, individual patterns can be created in the step sequencer including transpositions and scale quantisations.

Connections:

  • 2x stereo audio outputs for main and aux timbres
  • Stereo audio input for sample recording and real-time processing
  • High-Quality 24bit A/D and D/A converters
  • Headphone out with separate level adjustment
  • Sustain pedal input
  • Control pedal connector also capable of CV input (0-5V sensitivity)
  • USB host type A connector for interfacing MIDI controller or USB drives for sample/preset exchange and software updates
  • USB device type B connector for interfacing computer or other class-compliant MIDI USB hosts like iOS devices
  • SD Card for sample/preset exchange and software updates
  • DIN MIDI In, Out & Thru
  • Integrated power supply unit
  • Digital-Analog Polyphonic Synthesizer
  • 61 Keys high-quality Fatar TP/8SK keyboard, channel aftertouch
  • 8 voices
  • Dual timbral: split or layered mode with separate stereo audio outputs
  • 3 stereo digital oscillators each capable of five synthesis algorithms
  • Wavetable: Waldorf style with latest additions from Nave including speech synthesis, wavetable generation from audio and new features
  • Waveform: Waveform with up to 8 simultaneous waves per Oscillator in detuned or chordal mode with hard-sync, warp & PWM as well as tunable noise
  • Particle: Sampler in traditional and granular mode using multi-samples or live input
  • Resonator: Exciter using multi-sampling plus filter bank sound model.
  • New Kernel synthesis with possibilities from classic 6 operator FM to innovative audio rate wavetable modulations
  • Two analogue lowpass filters per voice each in 24 or 12 dB configuration using innovative link modes
  • Digital former: Additional digital algorithms per voice like comb filter, high-pass, band-pass & notch filters (Nave, Largo or PPG models), bit-crusher, drive and more
  • Flexible routing system for order of analog filters & digital former and individual oscillator routings
  • 6 LFOs in poly and global mode with extensive parameter set
  • 6 loopable envelopes
  • Komplex: multistage LFO/envelope modulator
  • Extensive modulation matrix with 40 slots and easy via-controller assignments
  • Intuitive modulation assignment via panel elements and control LEDs
  • Master effect rack of 5 slots for each timbre choosing from FX like phaser, flanger, chorus, reverb, drive, eq and more.
  • Compressor for main output
  • Step sequencer with step recording, parameter automation and scale-based pitch quantization
  • Microtonal pitch configurations capable of importing Skala scl files
  • Capable of polyphonic aftertouch via external MIDI inputs
  • Chord and latch buttons
  • Unisono mode
  • Module-based preset system for effects, oscillators, step-sequenzer and Komplex modulator
  • Single-function potentiometer and encoder controls for intuitive editing
  • Visualisation and deeper sound editing via context-sensitive high-resolution capacitive multi-touch display
  • Spectrum Analyzer and Oscilloscope at various processing stages
  • Up to 10,000 sound patch capacity organized by banks, attributes, author and patch number.
  • Favourites lists for quick recall of sound patches like for set-lists etc.
  • Pre-loaded with wide variety of patches by acclaimed sound designers like Howard Scarr
  • MIDI output of local keyboard, wheels and assignable panel elements
  • Automation of sound parameters from MIDI inputs via MIDI CC learn function
  • Recording of samples from audio inputs or self-recording of audio outputs
  • 4 GB*) internal Flash memory for presets, samples and wavetables
  • Pre-loaded with approx. 2 GB sample data
  • On board audio file editor
  • Export & import of presets, sample & wavetable via SD card or USB drive
  • Import of Nave presets and selected legacy FM .syx files
  • Mod wheel can be assigned to any parameter which can be modulated in the matrix or via quick assign
  • Pitch wheel can be assigned to each oscillator individually
  • Weight: 17.8kg
  • Dimensions: 1006 x 401 x 131 mm

Sampling capabilities

Each of the 3 Oscillators of a single timbre can be used in one of three modes using samples:

  • Stereo Multi-Sampler with looping and reverse playback
  • Granular Sampler with extensive parameter set
  • Resonator model using sampler as exciter
  • Samples are organized using key and velocity maps, selections rules like round robin, random etc., and individual pitch, gain and pan settings.
    Samples are stored in internal Flash memory of about 4GB capacity pre-filled with over 1GB specially made for Quantum factory samples.
    New samples can be recorded from external stereo audio inputs, or from self-recording Quantums own engine.
    Samples can also be imported an stored to internal Flash via SD card or USB drive using WAV and AIFF file format (44.1kHz sample rate).
  • The Quantum allows for a huge range of sample-based sound design capabilities from classical synths sounds to uncharted territories.
    It’s worth noting that the sample use in the Quantum is always within a synthesizer’s sonic context, and it is not meant to work as a “bread and butter” sample keyboard to play back like traditional sampling instruments nor third party libraries.

Huge range of arpeggiator parameters:

  • 7 Algorithms to choose from like up, down, random etc.
  • Octave range
  • 7 Sort Orders
  • 3 Velocity Modes
  • Gate length
  • Swing
  • BPM
  • Beat Division
  • Rhythmic patterns
  • Reset Modes
  • Keyboard Latch chordal and non-chordal

If that’s not enough, individual patterns can be created in the step sequencer including transpositions and scale quantisations.

Connections:

  • 2x stereo audio out for main and aux timbres
  • Stereo audio input for sample recording and real-time processing
  • High-Quality 24bit A/D and D/A converters
  • Headphone out with separate level adjustment
  • Sustain pedal input
  • Control pedal connector also capable of CV input (0-5V sensitivity)
  • USB host type A connector for interfacing MIDI controller or USB drives for sample/preset exchange and software updates
  • USB device type B connector for interfacing computer or other class-compliant MIDI USB hosts like iOS devices **)
  • SD Card for sample/preset exchange and software updates
  • DIN MIDI In, Out & Thru
  • Integrated power supply unit

Video

Video

Soundsets

Soundsets

Sound Demos

Sound Demos

Pictures

To download the product images in original size, simply click on the image to start the download

Pictures

FAQ + Download Area

FAQ Area

We answer your most frequently asked Questions about MK 2
Where can I find the download section and the manuals?2023-09-27T17:17:14+02:00

At the end of the FAQ list you will find the download links for this product.

Are the outputs from my device balanced or unbalanced?2022-12-02T17:03:24+01:00

This device has unbalanced outputs. We recommend using it with unbalanced cables.

My device isn’t recognized via USB.2023-09-27T17:14:32+02:00

Make sure that your device is connected to your computer directly and not through a hub.

Use the rear USB ports of your computer, not the front USB ports.

Disconnect all other USB devices from your computer which aren’t needed at the moment.

Change the USB cable or try from a different computer.

On Mac: Click on About this Mac in the Apple menu. Select System Report. Go to the Hardware dropdown menu on the left and unfold it. Select USB. Check if your device is listed there.

On Windows: Press the Win key+R. Enter devmgmt.msc and press OK. Check if your device is listed there. If it shows up as an “Unknown Device” and if there’s a black and yellow warning sign, deinstall the driver. Then unplug the instrument, reboot your machine and plug it back in.

How can I update the Panel Firmware?2022-12-04T17:11:03+01:00

The panel firmware isn’t updated automatically after an OS update and has to be updated manually after the installation of a new OS version.

Press Global -> System -> Flash Panel

Afterwards the new flash panel software will be installed. Keep following the instructions on the display.

IMPORTANT: Don’t turn your device off or unplug it from the power socket while the panel firmware is updated!

Which SD card can I use?2023-09-27T17:08:44+02:00

In general, you can use any commercially available SD card.

It should be formatted FAT32 or exFAT, which is standard when you buy a card. Special certifications (high speed cards – SDXC) for increased speed are not necessary and are more likely leading to misbehavior. A simple inexpensive SDHC card is usually quite sufficient.

However, we do not recommend using an SD card for storage purposes. The USB interface is much better suited, as it is more reliable and faster.  An SD card is only needed when restoring the factory settings (full init). In this case, an SD card and a USB device are required.  Of course, it can be practical to use an SD card if a keyboard or other USB controller is already connected to the USB host interface.

Since we have not tested all SD cards and the market is quite large, it is difficult to give a comprehensive recommendation.

What is the “Flash Panel” function for?2022-12-04T21:09:27+01:00

The Quantum update file contains the OS with the software for the synthesis, GUI, etc. and a separate software for the panel controller which drives the buttons, LEDs and potentiometers. Both of these are just in one file, the quantum.update.bin. If there is a newer panel software available in the update file on the card, Quantum will notify you about this panel software update when you update the main OS. In this case, you can push the Flash Panel button. Otherwise, this function does not have to be used.

How can I import and export patches?2023-09-27T16:59:54+02:00

Import: Copy the patches onto an SD card. Copy the patches in a way that all patches from one bank are within one folder on the card.
If you have bought a sound set, copy the entire directory with the sounds to the card. If there is a subfolder with samples, copy the entire directory so that the file structure is kept.

On your device, press Load>Actions>Import. Navigate to the card and mark the folder which contains the patches you want to import. Now the device asks where these files should be saved. Enter the number of the first slot into which the files should be imported. Press Import. The device now automatically imports all patches from the selected folder.
If OS 2.0 or higher is installed, the samples from the sub folder will be imported automatically as well and you can also use an USB stick instead of the card.

When you import an entire folder, all patches will be inserted into the slots in alphabetic order. Gaps between patches will be omitted and everything will be imported in one block.

Export: Please go to Load>Actions>Export. Here, you can select and export your patches.

From Version 2.0 and later, samples that belong to a patch will be exported automatically with the patch.

How can I contol parameters through MIDI CC?2023-09-27T16:59:06+02:00

Turn a knob on the front panel or tap on the corresponding rectangle on the screen with the parameter name you want to control. In the context menu that appears afterwards, press MIDI Learn CC.

Move your external control or tap the field and enter the CC number. Now the device will change the value upon incoming CC messages.

To control volume, press Layer. Tap onto the Vol rectangle in the upper left corner. Assign your CC as described above.

You can also go to Global>MIDI>Mappings and assign your CCs there.

Note that the assignment is valid globally for all patches. Make sure that you’re sending the CCs on the correct MIDI channel so that you change the values on the correct layer.

This device does not react to Program Change Messages!2023-09-27T16:55:19+02:00

You will have to use the Favorites list in order to get the Prog CH working.

Load a patch that you want to call up later. Go to a screen that is not Load/Save – for example, go to the Osc1 page.

Press on the Perform button or the central value encoder. This opens up the Favorites screen. Tap and hold an empty field to insert your current patch onto one of those fields. You can also use the Favorites function on the Load screen.

This device uses only to the entries in the Favorites lis when Prog CH messages are used. As soon as you have put the most needed patches there, you can call them up by MIDI.

When I turn the analog filter cutoff, the filter doesn’t change!2022-12-04T19:07:16+01:00

Please go to Global>System>Calibrate>Filters. Press Reset. After the reset all filter calibration data is erased, afterwards the filters should be controllable again.

In rare cases, you need to calibrate and reset the filter callibration data a second time.

The pitch bend and mod wheel do not behave as they should, how do I calibrate them correctly?2022-12-04T19:35:35+01:00

First of all, before you start, make sure the Mod wheel is at the lowest position and the pitch bend is in the middle position.

Go to Global>System>Calibrate>Wheels & AT.

Now move the pitch bend first up to the highest position, then let it snap back into the middle position. Now move it down to the lowest position. Repeat that five times. Make sure to push it all the way towards the upper and lower boundaries and don’t press or turn anything else on Quantum while you are doing it. Then move the mod wheel to the uppermost and lowermost position five times, again don’t press or turn anything else on while you are doing it

Afterwards, press more than five keys at the same time with high and low pressure to set the sensitivity for the aftertouch range.

Press Done when finished and then reboot Quantum. Now tap onto the VU meters in the lower left corner of the screen and switch to the MIDI Monitor. Check if everything works as it should. Pitch bend and mod wheel should not produce any messages unless they are being moved. If pitchbend, mod wheel and aftertouch are not working correctly, repeat the calibration process and follow the steps above exactly as mentioned.

How can I neutralize the effect of the pitch bend controller so that I can use the controller for other modulations?2022-12-04T19:47:01+01:00

Open the patch where you want to neutralize the pitch bend controller.

Add a modulation in the Mod Matrix:

Pitch Bend > Pitch. Set the Amount of this modulation to -70.60%. In order to get to this value, you will have to push the encoder for this value down to switch to Fine editing mode.

Now, you can turn the pitch bend wheel and the pitch will not change.

If the patch is set to a PB Range different than the default +12, you may either adjust the modulation value in the Mod Matrix or the PB range on the Osc1/2/3>Control tab.

When you’re done, save the patch to keep the changes.

This procedure has to be made in every patch where you want to apply this control.

How can I import patches from the DX7?2023-09-27T16:57:11+02:00

Go to Load>Actions>Import and select the .syx file on the card or USB stick. The device will now ask where to save the patches after the import and starts processing them.

Every DX7 patch will create an individual patch on the device. Settings will be imported to Osc1 Kernel.

Maybe the routing will be changed so that Osc1 bypasses the filters and goes directly into the VCA. This can be changed manually in Filters>Routing.

Note that this will only work with OS 2.0 or higher installed.

How can I use the effects and filters via the external audio input?2023-09-27T16:48:05+02:00

Under the following link you can download a PDF in which the most important settings are explained.

https://cloud.waldorfmusic.com/index.php/s/qH9faBGxPibofww


How can I play a split sound over an external Keyboard ?2024-03-26T15:39:23+01:00

To play a split sound via an external keyboard connected to the USB host port, the function: Apply Split to MIDI
must be activated. This can be found under: Global/MIDI/Inputs

How can I reset my Quantum/Iridium to factory settings?2023-09-27T17:00:57+02:00

Please log in to your “myWaldorf” account. Here you will find all the necessary files and instructions under “my hardware”.

I have mistyped an attribute for a patch and accidentally saved it. How can I correct that?2023-09-27T16:49:54+02:00

Create a new attribute with the correct spelling and assign it to the patch it belongs to. Make sure that no patch uses the attribute with the typo. On the next reboot, the mistyped attribute will be removed from the list.

What is the difference between Latch and Chord Mode?2022-12-04T19:56:06+01:00

In Latch Mode, a key is engaged when pressed and sustained until you hit the same key again, then the note will be released.

In Chord Mode, only the last note or chord will be held until you press the next key(s), then the previous notes will be released and the new note or chord will be sustained.

I want to play a sound that produces the same pitch over the entire keyboard. How do I do that?2022-12-04T20:59:02+01:00

Open the Mod Matrix and make three modulations: Keytrack -> Pitch or three times Keytrack -> Osc 1/2/3 pitch if you just want to do it for one of the oscillators. Two of the modulations should have -100% and one about -89%. Afterwards every key will produce the same pitch. To tune the base pitch use another modulation with Constant as the source.

I have connected an Expression Pedal to Quantum/Iridium Keyboard, but it doesn’t have any effect on anything.2022-12-04T20:18:04+01:00

The Expression Pedal must be assigned somewhere, otherwise it won’t have any effect. Go to the Mod Matrix and set a modulation with Pedal as a source and assign it to any destination you like.

If you want to control the volume with the pedal, set the pedal to zero. Create a modulation with Constant->Volume and adjust the amount into the negative area until the output level of Quantum is completely silent. Attention: Negative values for volume will also produce audible sound! You will have to hit the zero level exactly. When done, push the pedal to 100%. Set another modulation with Pedal->Volume. Slowly increase the amount until you can hear something. When the pedal is fully engaged, you can control the maximum loudness with the amount. Keep in mind while using this method, nothing will be audible when the pedal is not plugged in.

Or just use one modulation Pedal->Volume with a negative amount, then the volume gets softer as you press the pedal. In this way something will be audible as well when there is no pedal plugged in.

IMPORTANT: Remember to save the sound after the modulation has been set. The modulations are stored with the sound and have to be done individually for every sound.

Which footswitch and expression pedals can I use with my device?2022-12-04T20:23:17+01:00

Any sustain pedal with a 6,3mm jack that closes the contact when being pressed should work. Our recommendation is a Fatar/Studiologic VFP1/10. Only use a single pedal, dual pedals won’t work.

The pedal should be plugged in before the device is turned on. While the device is switched on and during booting, the pedal should not be pressed, otherwise its state will be inverted.

For the swell / continuous pedal, we recommend using a Fatar/Studiologic VP/27. Otherwise, other 10k maximum resistance expression/swell pedals with linear scale should work, too.

For both sustain and continuous, pedals compatible with Fatar, Roland, Moog, Kurzweil, M-Audio should be working as well.

The Korg/Yamaha models may not work though.

Why did Quantum arrive in a cloth bag instead of plastic?2022-12-04T21:12:04+01:00

We felt that wrapping this exclusive instrument in plastic would have been inappropriate and wouldn’t have done this instrument justice. Also, the cloth bag protects the instrument from being scratched better than a plastic bag could do.

Can I lift up my Quantum by the aluminum rod on the back?2024-01-17T14:37:49+01:00

Yes, you can lift up Quantum and move it around using that rod as a handle.

Does my device send audio via its USB connection?2023-09-27T17:12:30+02:00

No, this device only sends and receives MIDI via USB. Transferring audio via USB isn’t possible.

The device has crashed!2023-09-27T16:54:14+02:00

First, please update the OS. We often release a new firmware with new features and we definetly recommend to do an update. The procedure takes less than a minute. You find the latest updates in your “myWaldorf” account under “myHardware”.

The OS is really stable so crashes rarely occur. If the device crashes anyway, please generate a system logfile by pressing Global>System>Support Log. Include your name and crash date in the file name when saving. Send us your file and we will have a look at your issue.

The line output signal level on my device is very low or distorted or noisy.2023-09-27T17:43:14+02:00

Make sure that the necessary cables are connected properly and that the introduced signals are the correct type. Also, the device must be powered correctly.

If that and the other hints described on the FAQs do not help, please contact your dealer. In case your device is out of warranty, please use the support form at the bottom page.

I need spare parts for my device, where can I get them?2023-09-27T17:11:07+02:00

In the shop you will find a detailed overview. However, ordering and shipping is only possible in Europe.

I think I have to send my device in, how do I proceed? What do I have to do when I send my unit to Waldorf from outside the European Union?2023-09-27T17:10:04+02:00

First, make sure you’ve tried all the procedures above that are related to your issue.

If nothing helps and your device is still covered by warranty, please contact the retailer where this device has been bought.

All our devices come with 2 years of warranty. Depending on local law, some retailers only cover 1 year of warranty service. If your device has been bought more than one but less than two years ago, and your dealer refuses to do a warranty service repair, please contact the distributor for your area. You will find a list of them here: https://waldorfmusic.com/en/international-distributors

If your device is out of warranty, please, use the button in the upper right corner. Please, give a precise description of the error. If it’s really necessary to send in your unit, we will issue an RMA form.

Wrap up your device safely. Ensure that it’s padded at least 5cm/2inches in ALL directions all around. Use a sturdy cardboard box and parcel tape. Do not use gaffers tape as this often becomes detached during transport. You are responsible for transport damages that result in improper wrapping. Best if you use the original padding and box, then wrap up the device as it was when you received it.

Fill out the RMA form on your computer. Print it out, sign it and put it INSIDE the box. We reserve the right to refuse working on devices which come with no error description.

IMPORTANT: When sending in your device from outside the EU

All packages must have a proforma invoice stuck on the OUTSIDE of the box. This is important for the customs duty. The contents of the parcel must be named and described exactly on the invoice, with declaration of the date of purchase and condition of the unit.

We would recommend to describe your device as defective and mark the contents of the parcel at a total value of 25€ or less. Otherwise, there will be extra fees (tax) from customs duties which we must pass onto you. No tax will be charged for goods with a value less than 25 €. Keep in mind that in case the parcel gets lost, the insurance of the post service (if applicable) will only refund the value marked in the declaration.

If the above points are not considered, please be aware that we must charge you the extra costs which arise through customs duty for storage and the additional handling etc. This would be an amount between 60 – 100 Euro.

Go to Top