Iridium Keyboard EN2023-09-13T11:19:07+02:00

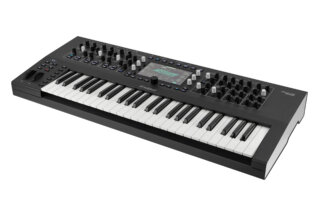
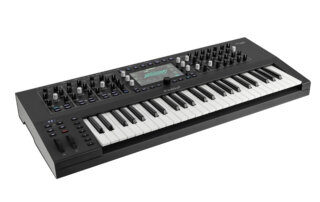
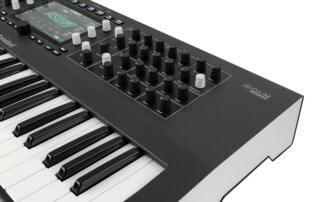
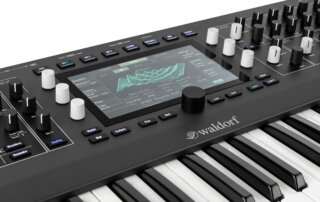
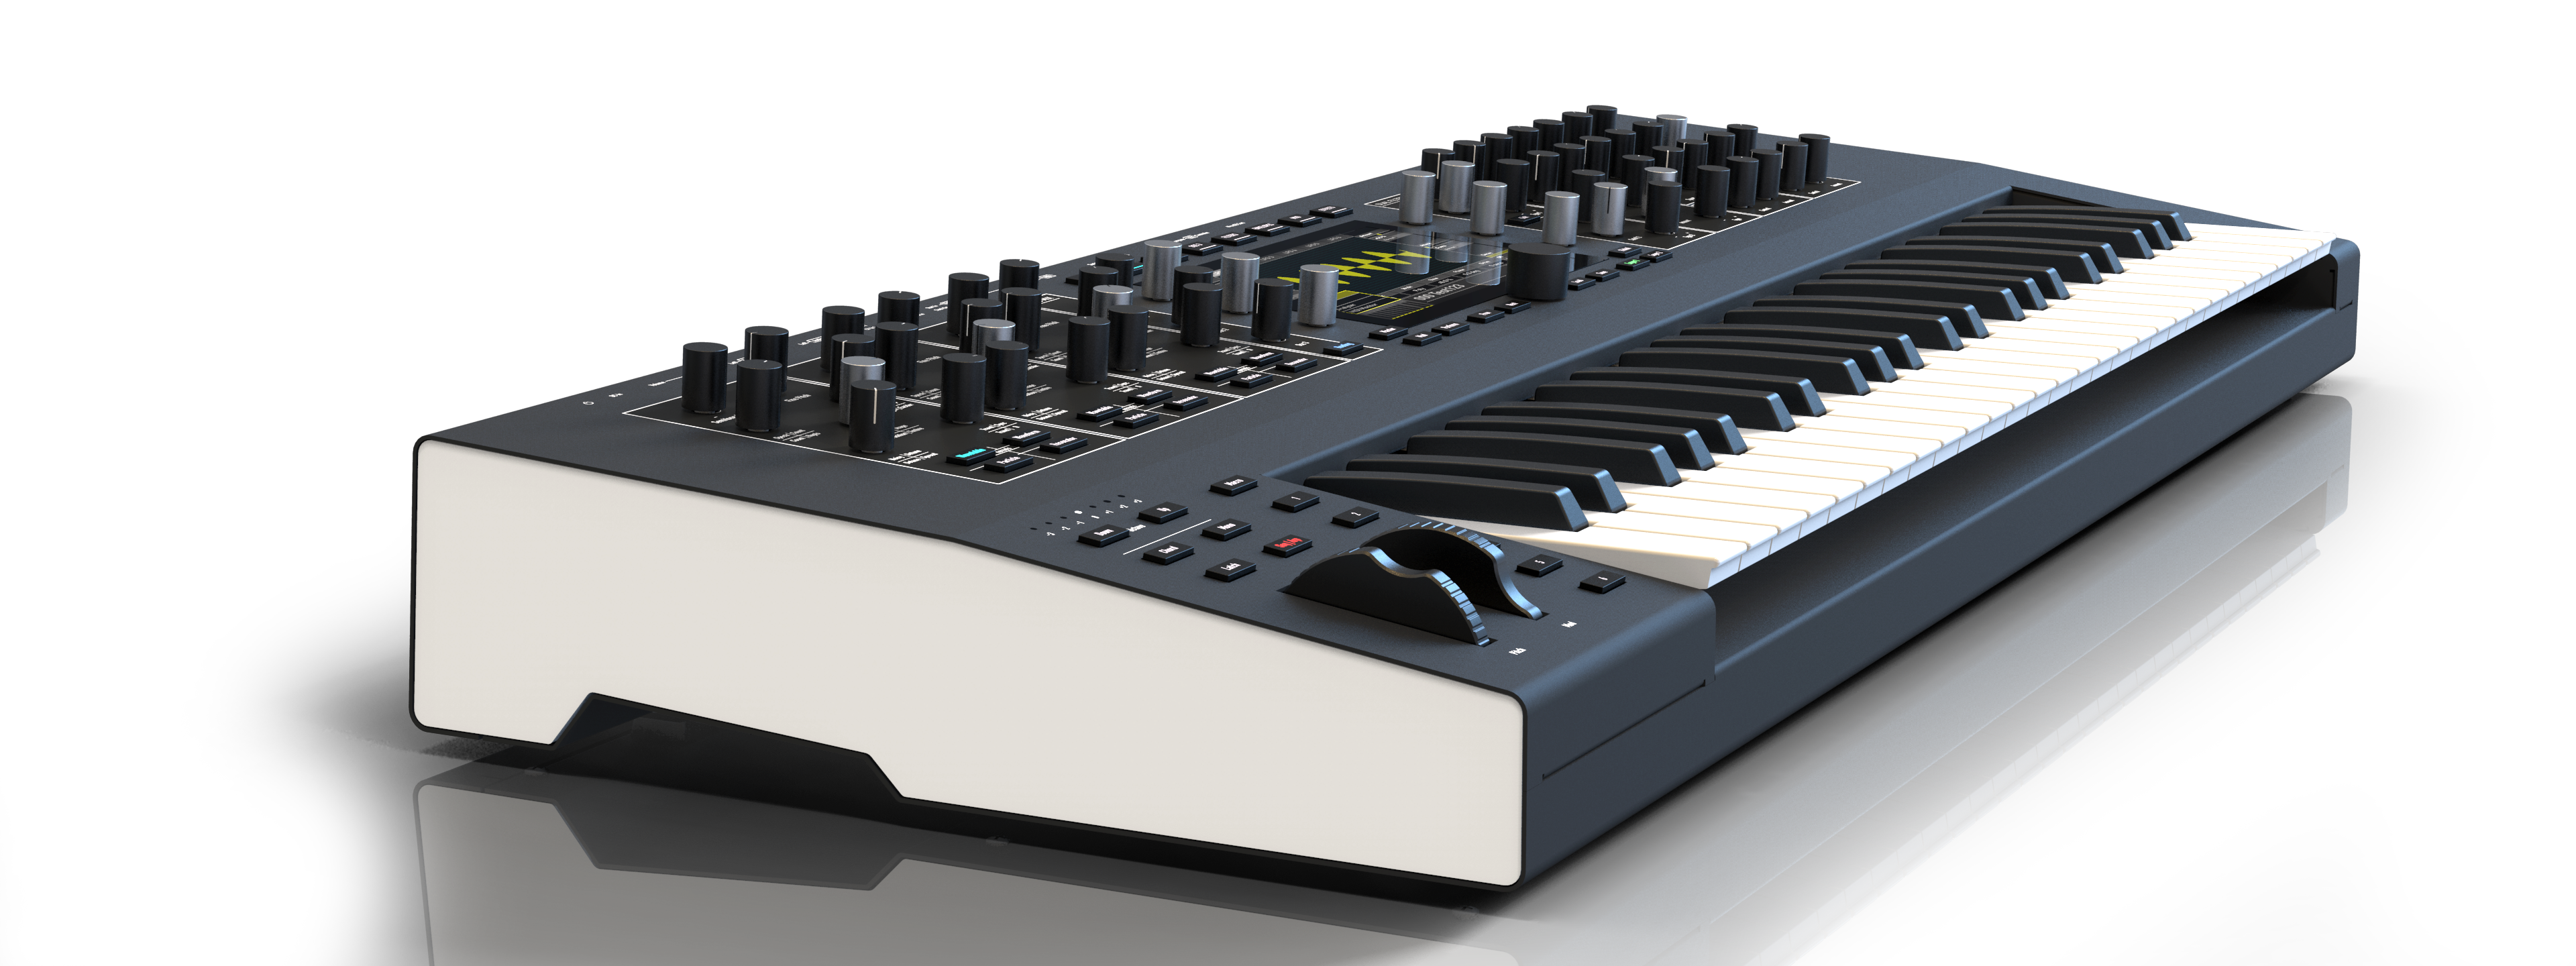
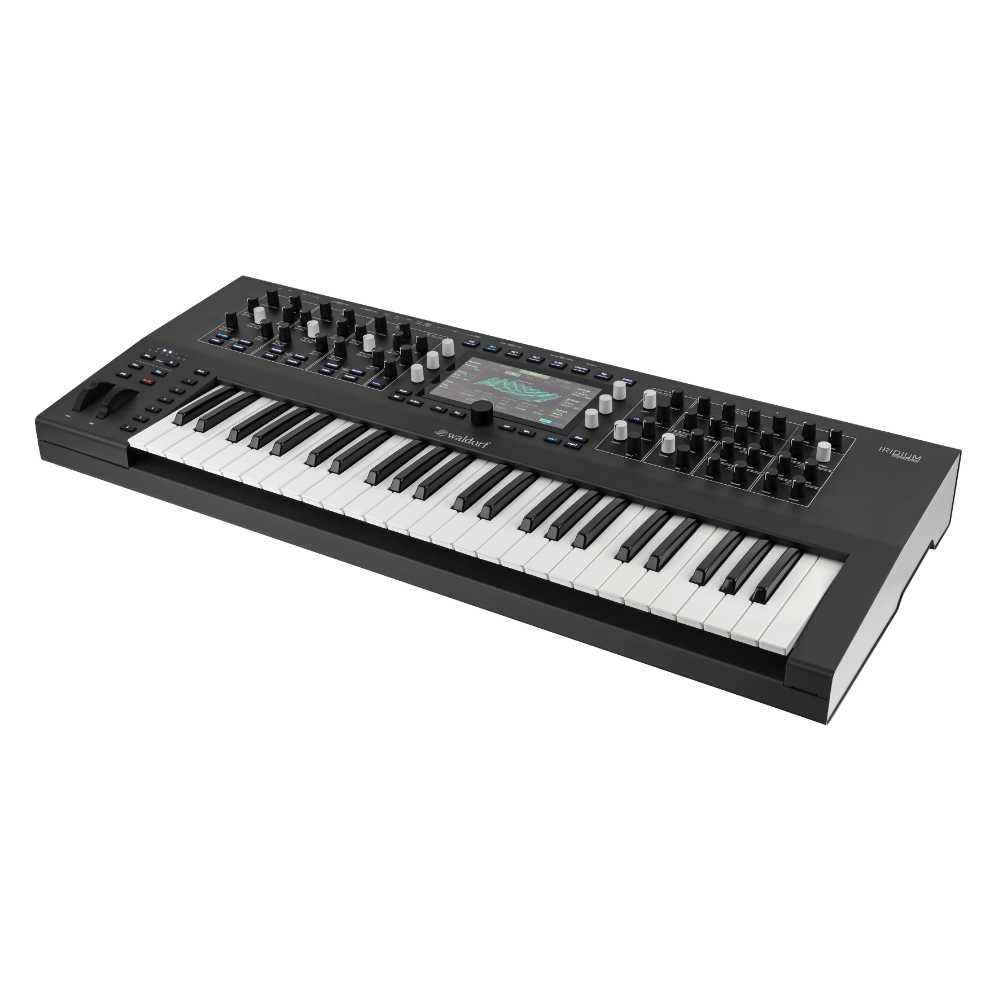
After introducing Iridium as a high-class synthesizer in a compact desktop form factor we take the concept further forward with the Iridium Keyboard. It’s boosting an all-new 49-key FATAR TP/8SK semi-weighted polyphonic aftertouch pressure-providing keyboard as the first such implementation of that keyboard in the world, with an expanded front panel proffering one-knob-per-function control as a workflow-raising result of this high-class synthesizer’s palpable physical makeover, also allowing for six freely-programmable Macro buttons with which users can define functions from a wide range of features for additional performance control.
Tremendous tonal changes flow freely when playing the Iridium Keyboard live since polyphonic aftertouch is transmitted individually for each note played. Performers can conceivably play and hold down any number of keys simultaneously, subsequently moving each finger individually. In other words, individual keys are affected by the pressure applied by each finger, thereby creating, for instance, individual data streams for modulation purposes, whereas with monophonic (Channel) aftertouch all notes played will respond in the same way. With a powerful Mod Matrix offering 40 independent modulation assignments, each with individual settings for Source, Amount, and Destination, Iridium Keyboard comes with powerful modulation options — just like the Iridium desktop synthesizer namesake. Notably, Iridium Keyboard is also capable of processing MPE (MIDI Polyphonic Expression) data, duly making multiple parameters of different notes separately controllable to effectively enable it to behave more like an acoustic instrument in terms of spontaneous, polyphonic sound control.

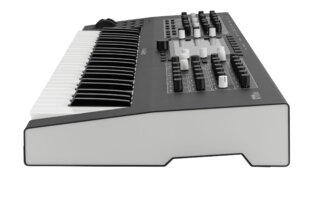
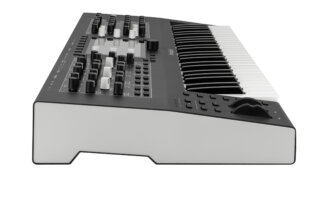
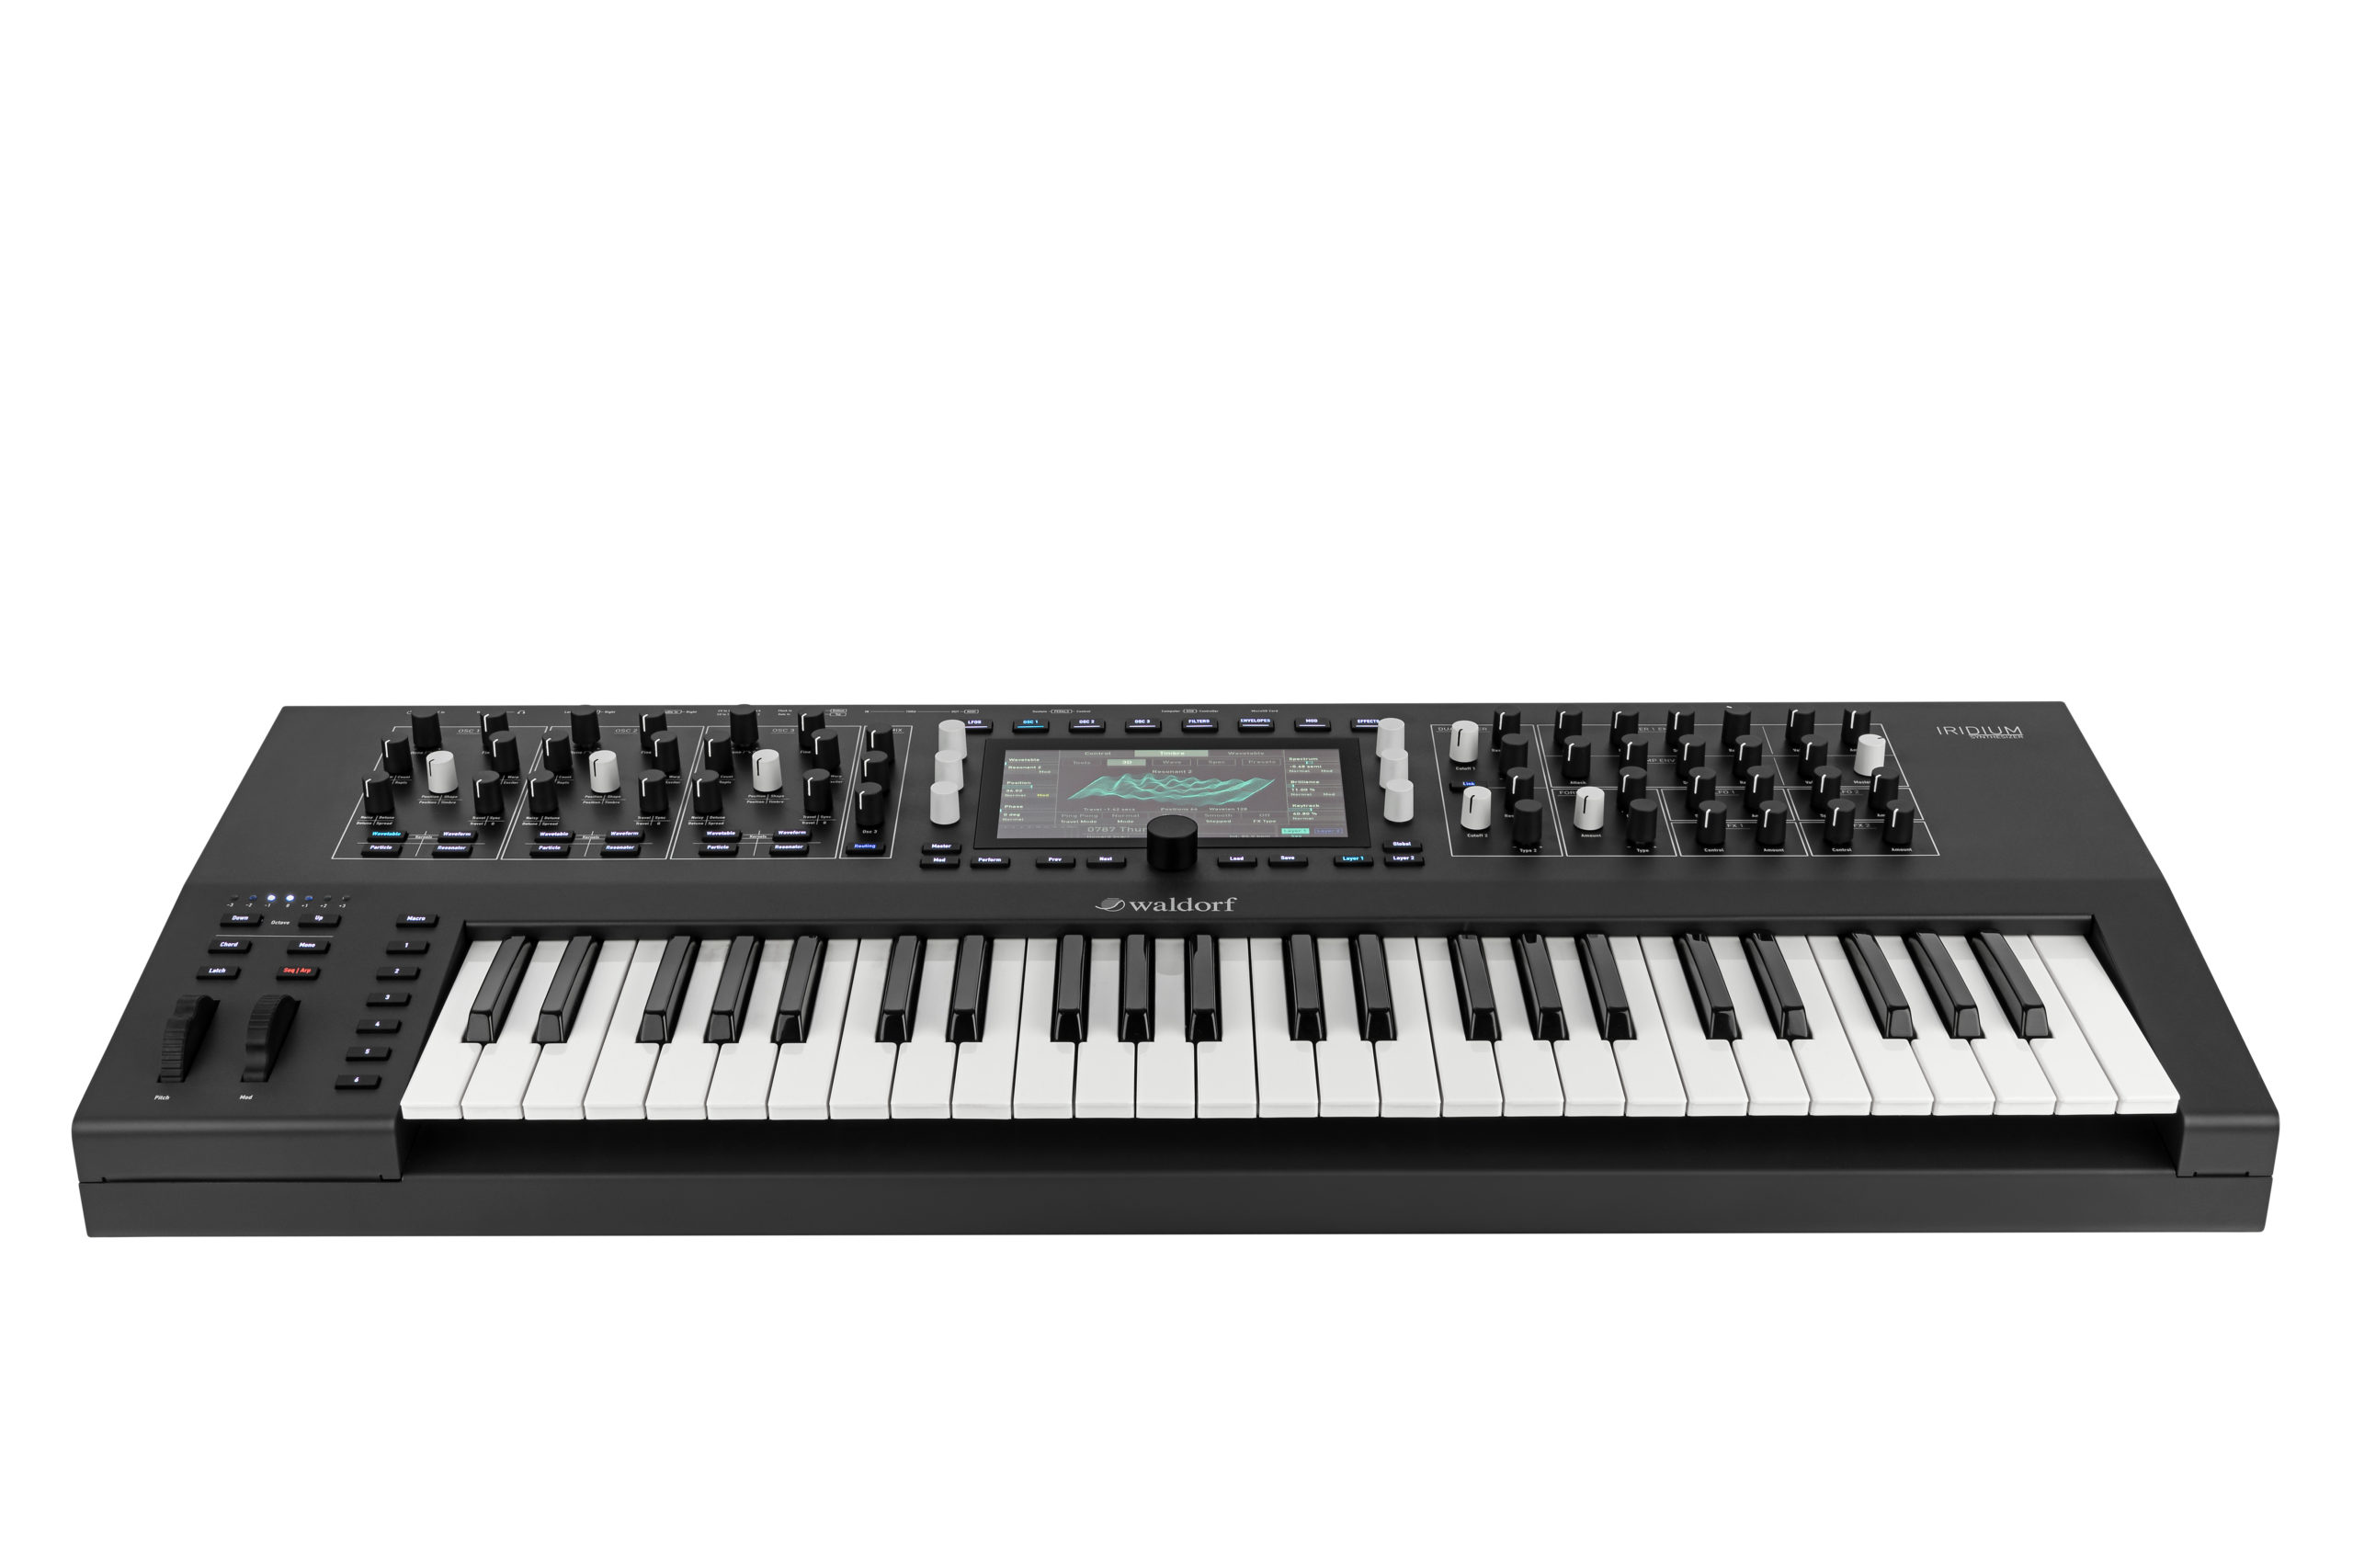
Clearly, the 851 mm (W) x 355 mm (D) x 110 mm (H) physical dimensions of Iridium Keyboard has resulted in some marked differences to the original Iridium desktop design, with a one-knob-per-function control approach afforded by its naturally expanded front panel, albeit aided still by its industrial-grade highly-responsive touchscreen display to provide an interactive overview of the Mode page selected (via associated LFOS, OSC 1, OSC 2, OSC 3, FILTERS, MOD, and EFFECTS buttons), parameter changes, and additional information. Indeed, Iridium Keyboard also incorporates six freely-programmable Macro buttons adjacent to the Pitch and Mod (modulation) wheels with which users can define functions from a wide range of features for additional performance control, combining to further enhance its performance pedigree.

Sounds from our Quantum synthesizer flagship can conveniently be loaded into Iridium Keyboard and vice-versa.

Iridium Keyboard — with its industrial design bearing the high-class hallmarks of Axel Hartmann — takes pride of place in the high-quality German synthesizer developer’s distinctive family tree as another direct descendent of the legendary PPG Wave synthesizer series that made their mark throughout the Eighties by bringing the distinctive sound of wavetable synthesis to the musical masses. Musically, though, the Iridium Keyboard — like its Iridium desktop synthesizer sibling — brings much more to the production table than its acclaimed ancestor, featuring five different synthesis models for each of its three oscillators (OSC 1, OSC 2, and OSC 3): Wavetable — a table consisting of single-cycle waveforms; Waveform (virtual analogue) — a standard oscillator model to create typical analogue waveforms; Particle (sampling and granular sampling) — allowing for extensive manipulation of sample-based sounds; Resonator — manipulates multi- samples from the internal (2GB) sample flash memory or noise via an exciter and various spectral parameters that can be modulated, matchless for generating awe- inspiring animated sounds and drones, which can, for example, easily be integrated into a Eurorack modular synthesizer environment via the Iridium Keyboard’s integrated control voltage connections (CV In1, CV In2, CV In3, and CV In4); and Kernels — effectively enabling one oscillator to become up to six sub-oscillators that can be interlinked through FM at audio rate and arranged in user-definable constellations.

Other fanciful features include three true stereo path digital filters per voice that convincingly cover all conceivable classic filter variants — various digital filters are additionally offered by the FORMER section, such as Comb, classic Waldorf high- and band-pass, and notch filters from our Largo and Nave software synthesizers, plus PPG models, alongside signal enhancer effects, such as Drive and Bit Crusher, and more; six envelopes, six LFOs, and much more besides are available for use as sources in the Mod Matrix, routable to almost any numerical value in Iridium Keyboard.

Connectivity-wise, the Iridium Keyboard communicates with the outside world, thanks to two audio inputs (for processing external signals); CV inputs as well as Gate In and Trigger In connections (for forwarding external signals to the Mod Matrix); Clock In and Clock Out connections (to synchronise with other gear); USB and DIN MIDI connections; USB Host port (provided for MIDI devices and also handling data exchange); Control and Sustain Pedals inputs; a headphone output (with dedicated volume control); and last, but not least, two audio outputs.

Iridium Keyboards contains 1680 sounds programmed by a group of well known sound designers like: Howard Scarr, Richard Devine, Kurt Ader, BT, Matt Johnson, Reinhold Heil, Jörg Hüttner, Mike Huckaby, Thorsten Quaeschning and Sascha Dikiciyan.
Iridium Keyboard

Specifications

Specifications

  • 16-voice polyphony, duo-timbral
  • Compatible with the Waldorf Quantum synth engine

3 Oscillators
Oscillator Modes:

  • Wavetable
  • Waveform (VA)
  • Particle (Sampling and Granular Sampling)
  • Resonator
  • Kernels (up to 6 sub-oscillators which can be interlinked through FM at audio rate)

3 Stereo Filters per voice
True stereo path Dual Digital Filter:

  • Two filters with independable modes
  • 12/24dB LP/HP/BP in all combinations
  • Nave, Largo, PPG, Quantum and StateVariable models

Digital Former:

  • Filter models from Waldorf Nave, Largo and PPG in HP/LP/BP/Notch
  • Comb filter
  • Bitcrusher
  • Drive
  • RingMod
  • StateVariable mode
  • Analyzer displayed in Filter view
  • Filter curve moves when modulated (optional)
  • Sophisticated filter routing options with modulatable panning and levels

Modulators:

  • 6 Envelopes
  • 6 LFOs
  • Komplex Modulator (LFO/Envelope combination with user-definable shape)

Mod Matrix:

  • 40 slots
  • Fast assign mode
  • One additional control amount per slot
  • Identical Sources and Destinations can be used multiple times until the matrix is full

Keyboard:

  • 49 keys Fatar TP/8SK keyboard
  • Semi-weighted sensitive keys with polyphonic aftertouch
  • Latch mode

Performance features:

  • Arpeggiator
  • Step sequencer with up to 32 steps for notes and parameters
  • Favorites screen for quick patch recall
  • Mod Wheel, Pitch Bend and Poly-Aftertouch
  • MPE capable
  • 6 Macro buttons (six freely-programmable buttons to switch on and off functions)

Screen:

  • Industrial-grade highly responsive touch screen

Patches:

  • Over 1000 factory sounds
  • Capacity of 7000 patch memory slots (numbers 0000-9999 can be used)
  • Patches from Quantum can be loaded and vice-versa
  • Category filter for patch list
  • 2GB user sample flash memory

Connections:

  • 2x TS output
  • 2x TS input
  • Headphones output with Gain control
  • DIN MIDI In/Out/Thru
  • USB Type B for MIDI connection to computers / DAWs
  • USB Type A for direct connection of storage devices and MIDI controllers
  • MicroSD slot

CV connections:

  • 4 CV inputs plus Gate In, Trigger In, Clock In, Clock Out
  • Inputs can be used as modulation sources in the Mod Matrix

Overall:

  • Sturdy metal case
  • Dimensions: 851 mm wide by 355 mm depth by 110 mm height (including controls)
  • Weight: 14 kg
  • 16-voice polyphony, duo-timbral
  • Compatible with the Waldorf Quantum synth engine

3 Oscillators
Oscillator Modes:

  • Wavetable
  • Waveform (VA)
  • Particle (Sampling and Granular Sampling)
  • Resonator
  • Kernels (up to 6 sub-oscillators which can be interlinked through FM at audio rate)

3 Stereo Filters per voice
True stereo path Dual Digital Filter:

  • Two filters with independable modes
  • 12/24dB LP/HP/BP in all combinations
  • Nave, Largo, PPG, Quantum and StateVariable models

Digital Former:

  • Filter models from Waldorf Nave, Largo and PPG in HP/LP/BP/Notch
  • Comb filter
  • Bitcrusher
  • Drive
  • RingMod
  • StateVariable mode
  • Analyzer displayed in Filter view
  • Filter curve moves when modulated (optional)
  • Sophisticated filter routing options with modulatable panning and levels

Modulators:

  • 6 Envelopes
  • 6 LFOs
  • Komplex Modulator (LFO/Envelope combination with user-definable shape)

Mod Matrix:

  • 40 slots
  • Fast assign mode
  • One additional control amount per slot
  • Identical Sources and Destinations can be used multiple times until the matrix is full

Keyboard:

  • 49 keys Fatar TP/8SK keyboard
  • Semi-weighted sensitive keys with polyphonic aftertouch
  • Latch mode
Performance features:

  • Arpeggiator
  • Step sequencer with up to 32 steps for notes and parameters
  • Favorites screen for quick patch recall
  • Mod Wheel, Pitch Bend and Poly-Aftertouch
  • MPE capable
  • 6 Macro buttons (six freely-programmable buttons to switch on and off functions)

Screen:

  • Industrial-grade highly responsive touch screen

Patches:

  • Over 1000 factory sounds
  • Capacity of 7000 patch memory slots (numbers 0000-9999 can be used)
  • Patches from Quantum can be loaded and vice-versa
  • Category filter for patch list
  • 2GB user sample flash memory

Connections:

  • 2x TS output
  • 2x TS input
  • Headphones output with Gain control
  • DIN MIDI In/Out/Thru
  • USB Type B for MIDI connection to computers / DAWs
  • USB Type A for direct connection of storage devices and MIDI controllers
  • MicroSD slot

CV connections:

  • 4 CV inputs plus Gate In, Trigger In, Clock In, Clock Out
  • Inputs can be used as modulation sources in the Mod Matrix

Overall:

  • Sturdy metal case
  • Dimensions: 851 mm wide by 355 mm depth by 110 mm height (including controls)
  • Weight: 14 kg

Video

Video

Soundsets

Soundsets

Sound Demos

Sound Demo

Pictures

To download the product images in original size, simply click on the image to start the download

Pictures

FAQ + Download Area

FAQ + Download Area

We answer your most frequently asked questions about Iridium Keyboard

We answer your most frequently asked Questions about Iridium Keyboard
Where can I find the download section and the manuals?2023-09-27T17:17:14+02:00

At the end of the FAQ list you will find the download links for this product.

How can I update my Quantum/Iridium?2023-09-27T17:05:57+02:00

After you have logged into your “myWaldorf” account, you will find a link “myHardware” below the “licence keys”. There you will find updates, init files and much more.

Are the outputs from my device balanced or unbalanced?2022-12-02T17:03:24+01:00

This device has unbalanced outputs. We recommend using it with unbalanced cables.

My device isn’t recognized via USB.2023-09-27T17:14:32+02:00

Make sure that your device is connected to your computer directly and not through a hub.

Use the rear USB ports of your computer, not the front USB ports.

Disconnect all other USB devices from your computer which aren’t needed at the moment.

Change the USB cable or try from a different computer.

On Mac: Click on About this Mac in the Apple menu. Select System Report. Go to the Hardware dropdown menu on the left and unfold it. Select USB. Check if your device is listed there.

On Windows: Press the Win key+R. Enter devmgmt.msc and press OK. Check if your device is listed there. If it shows up as an “Unknown Device” and if there’s a black and yellow warning sign, deinstall the driver. Then unplug the instrument, reboot your machine and plug it back in.

How can I update the Panel Firmware?2022-12-04T17:11:03+01:00

The panel firmware isn’t updated automatically after an OS update and has to be updated manually after the installation of a new OS version.

Press Global -> System -> Flash Panel

Afterwards the new flash panel software will be installed. Keep following the instructions on the display.

IMPORTANT: Don’t turn your device off or unplug it from the power socket while the panel firmware is updated!

Which SD card can I use?2023-09-27T17:08:44+02:00

In general, you can use any commercially available SD card.

It should be formatted FAT32 or exFAT, which is standard when you buy a card. Special certifications (high speed cards – SDXC) for increased speed are not necessary and are more likely leading to misbehavior. A simple inexpensive SDHC card is usually quite sufficient.

However, we do not recommend using an SD card for storage purposes. The USB interface is much better suited, as it is more reliable and faster.  An SD card is only needed when restoring the factory settings (full init). In this case, an SD card and a USB device are required.  Of course, it can be practical to use an SD card if a keyboard or other USB controller is already connected to the USB host interface.

Since we have not tested all SD cards and the market is quite large, it is difficult to give a comprehensive recommendation.

How can I import and export patches?2023-09-27T16:59:54+02:00

Import: Copy the patches onto an SD card. Copy the patches in a way that all patches from one bank are within one folder on the card.
If you have bought a sound set, copy the entire directory with the sounds to the card. If there is a subfolder with samples, copy the entire directory so that the file structure is kept.

On your device, press Load>Actions>Import. Navigate to the card and mark the folder which contains the patches you want to import. Now the device asks where these files should be saved. Enter the number of the first slot into which the files should be imported. Press Import. The device now automatically imports all patches from the selected folder.
If OS 2.0 or higher is installed, the samples from the sub folder will be imported automatically as well and you can also use an USB stick instead of the card.

When you import an entire folder, all patches will be inserted into the slots in alphabetic order. Gaps between patches will be omitted and everything will be imported in one block.

Export: Please go to Load>Actions>Export. Here, you can select and export your patches.

From Version 2.0 and later, samples that belong to a patch will be exported automatically with the patch.

How can I contol parameters through MIDI CC?2023-09-27T16:59:06+02:00

Turn a knob on the front panel or tap on the corresponding rectangle on the screen with the parameter name you want to control. In the context menu that appears afterwards, press MIDI Learn CC.

Move your external control or tap the field and enter the CC number. Now the device will change the value upon incoming CC messages.

To control volume, press Layer. Tap onto the Vol rectangle in the upper left corner. Assign your CC as described above.

You can also go to Global>MIDI>Mappings and assign your CCs there.

Note that the assignment is valid globally for all patches. Make sure that you’re sending the CCs on the correct MIDI channel so that you change the values on the correct layer.

This device does not react to Program Change Messages!2023-09-27T16:55:19+02:00

You will have to use the Favorites list in order to get the Prog CH working.

Load a patch that you want to call up later. Go to a screen that is not Load/Save – for example, go to the Osc1 page.

Press on the Perform button or the central value encoder. This opens up the Favorites screen. Tap and hold an empty field to insert your current patch onto one of those fields. You can also use the Favorites function on the Load screen.

This device uses only to the entries in the Favorites lis when Prog CH messages are used. As soon as you have put the most needed patches there, you can call them up by MIDI.

How do I use gate in and set 1 Volt per Octave pitch control from my modular into Iridium?2023-11-28T15:49:03+01:00

Select the chosen CV Input in the Mod Matrix as source and Pitch as destination. Set Amount to 100%.
Go to Global>Settings>CV and set CV scale to about 2V (or less) which corresponds to the 2 Oct pitch amplitude in the mod matrix.
Each CV input can be individually scaled.
Press the encoder once or twice to do fine adjustment.

Iridium Desktop
For the function of the “Gate In” no special setting must be made. However, the arpeggiator (performance/autoplay) must be switched off. The red LED must not be on. Just press the button again until the LED is white. This is also the reason why an Init patch works with the gate and some other patches do not.

Iridium Keyboard

Go to Performance/Autoplay and select “off”.


The pitch bend and mod wheel do not behave as they should, how do I calibrate them correctly?2022-12-04T19:35:35+01:00

First of all, before you start, make sure the Mod wheel is at the lowest position and the pitch bend is in the middle position.

Go to Global>System>Calibrate>Wheels & AT.

Now move the pitch bend first up to the highest position, then let it snap back into the middle position. Now move it down to the lowest position. Repeat that five times. Make sure to push it all the way towards the upper and lower boundaries and don’t press or turn anything else on Quantum while you are doing it. Then move the mod wheel to the uppermost and lowermost position five times, again don’t press or turn anything else on while you are doing it

Afterwards, press more than five keys at the same time with high and low pressure to set the sensitivity for the aftertouch range.

Press Done when finished and then reboot Quantum. Now tap onto the VU meters in the lower left corner of the screen and switch to the MIDI Monitor. Check if everything works as it should. Pitch bend and mod wheel should not produce any messages unless they are being moved. If pitchbend, mod wheel and aftertouch are not working correctly, repeat the calibration process and follow the steps above exactly as mentioned.

How can I neutralize the effect of the pitch bend controller so that I can use the controller for other modulations?2022-12-04T19:47:01+01:00

Open the patch where you want to neutralize the pitch bend controller.

Add a modulation in the Mod Matrix:

Pitch Bend > Pitch. Set the Amount of this modulation to -70.60%. In order to get to this value, you will have to push the encoder for this value down to switch to Fine editing mode.

Now, you can turn the pitch bend wheel and the pitch will not change.

If the patch is set to a PB Range different than the default +12, you may either adjust the modulation value in the Mod Matrix or the PB range on the Osc1/2/3>Control tab.

When you’re done, save the patch to keep the changes.

This procedure has to be made in every patch where you want to apply this control.

How can I import patches from the DX7?2023-09-27T16:57:11+02:00

Go to Load>Actions>Import and select the .syx file on the card or USB stick. The device will now ask where to save the patches after the import and starts processing them.

Every DX7 patch will create an individual patch on the device. Settings will be imported to Osc1 Kernel.

Maybe the routing will be changed so that Osc1 bypasses the filters and goes directly into the VCA. This can be changed manually in Filters>Routing.

Note that this will only work with OS 2.0 or higher installed.

How can I use the effects and filters via the external audio input?2023-09-27T16:48:05+02:00

Under the following link you can download a PDF in which the most important settings are explained.

https://cloud.waldorfmusic.com/index.php/s/qH9faBGxPibofww


How can I play a split sound over an external Keyboard ?2024-03-26T15:39:23+01:00

To play a split sound via an external keyboard connected to the USB host port, the function: Apply Split to MIDI
must be activated. This can be found under: Global/MIDI/Inputs

How can I reset my Quantum/Iridium to factory settings?2023-09-27T17:00:57+02:00

Please log in to your “myWaldorf” account. Here you will find all the necessary files and instructions under “my hardware”.

Which power supply can I use?2022-12-04T17:00:57+01:00

Please use only the provided power supply. If this didn’t come with your device, please contact your dealer.

The cable between the power supply and your power socket is a common “figure of eight” or C7 plug type. If you happen to have the EU version of the PSU but live outside the EU, you can just get the matching cable to connect it to your socket. The power supply is a wide-range type for every range and combination between 110-240V and 50-60Hz.

This device can’t be powered via USB.

I have mistyped an attribute for a patch and accidentally saved it. How can I correct that?2023-09-27T16:49:54+02:00

Create a new attribute with the correct spelling and assign it to the patch it belongs to. Make sure that no patch uses the attribute with the typo. On the next reboot, the mistyped attribute will be removed from the list.

What is the difference between Latch and Chord Mode?2022-12-04T19:56:06+01:00

In Latch Mode, a key is engaged when pressed and sustained until you hit the same key again, then the note will be released.

In Chord Mode, only the last note or chord will be held until you press the next key(s), then the previous notes will be released and the new note or chord will be sustained.

I want to play a sound that produces the same pitch over the entire keyboard. How do I do that?2022-12-04T20:59:02+01:00

Open the Mod Matrix and make three modulations: Keytrack -> Pitch or three times Keytrack -> Osc 1/2/3 pitch if you just want to do it for one of the oscillators. Two of the modulations should have -100% and one about -89%. Afterwards every key will produce the same pitch. To tune the base pitch use another modulation with Constant as the source.

I have connected an Expression Pedal to Quantum/Iridium Keyboard, but it doesn’t have any effect on anything.2022-12-04T20:18:04+01:00

The Expression Pedal must be assigned somewhere, otherwise it won’t have any effect. Go to the Mod Matrix and set a modulation with Pedal as a source and assign it to any destination you like.

If you want to control the volume with the pedal, set the pedal to zero. Create a modulation with Constant->Volume and adjust the amount into the negative area until the output level of Quantum is completely silent. Attention: Negative values for volume will also produce audible sound! You will have to hit the zero level exactly. When done, push the pedal to 100%. Set another modulation with Pedal->Volume. Slowly increase the amount until you can hear something. When the pedal is fully engaged, you can control the maximum loudness with the amount. Keep in mind while using this method, nothing will be audible when the pedal is not plugged in.

Or just use one modulation Pedal->Volume with a negative amount, then the volume gets softer as you press the pedal. In this way something will be audible as well when there is no pedal plugged in.

IMPORTANT: Remember to save the sound after the modulation has been set. The modulations are stored with the sound and have to be done individually for every sound.

Which footswitch and expression pedals can I use with my device?2022-12-04T20:23:17+01:00

Any sustain pedal with a 6,3mm jack that closes the contact when being pressed should work. Our recommendation is a Fatar/Studiologic VFP1/10. Only use a single pedal, dual pedals won’t work.

The pedal should be plugged in before the device is turned on. While the device is switched on and during booting, the pedal should not be pressed, otherwise its state will be inverted.

For the swell / continuous pedal, we recommend using a Fatar/Studiologic VP/27. Otherwise, other 10k maximum resistance expression/swell pedals with linear scale should work, too.

For both sustain and continuous, pedals compatible with Fatar, Roland, Moog, Kurzweil, M-Audio should be working as well.

The Korg/Yamaha models may not work though.

Does my device send audio via its USB connection?2023-09-27T17:12:30+02:00

No, this device only sends and receives MIDI via USB. Transferring audio via USB isn’t possible.

The device has crashed!2023-09-27T16:54:14+02:00

First, please update the OS. We often release a new firmware with new features and we definetly recommend to do an update. The procedure takes less than a minute. You find the latest updates in your “myWaldorf” account under “myHardware”.

The OS is really stable so crashes rarely occur. If the device crashes anyway, please generate a system logfile by pressing Global>System>Support Log. Include your name and crash date in the file name when saving. Send us your file and we will have a look at your issue.

The line output signal level on my device is very low or distorted or noisy.2023-09-27T17:43:14+02:00

Make sure that the necessary cables are connected properly and that the introduced signals are the correct type. Also, the device must be powered correctly.

If that and the other hints described on the FAQs do not help, please contact your dealer. In case your device is out of warranty, please use the support form at the bottom page.

I need spare parts for my device, where can I get them?2023-09-27T17:11:07+02:00

In the shop you will find a detailed overview. However, ordering and shipping is only possible in Europe.

I think I have to send my device in, how do I proceed? What do I have to do when I send my unit to Waldorf from outside the European Union?2023-09-27T17:10:04+02:00

First, make sure you’ve tried all the procedures above that are related to your issue.

If nothing helps and your device is still covered by warranty, please contact the retailer where this device has been bought.

All our devices come with 2 years of warranty. Depending on local law, some retailers only cover 1 year of warranty service. If your device has been bought more than one but less than two years ago, and your dealer refuses to do a warranty service repair, please contact the distributor for your area. You will find a list of them here: https://waldorfmusic.com/en/international-distributors

If your device is out of warranty, please, use the button in the upper right corner. Please, give a precise description of the error. If it’s really necessary to send in your unit, we will issue an RMA form.

Wrap up your device safely. Ensure that it’s padded at least 5cm/2inches in ALL directions all around. Use a sturdy cardboard box and parcel tape. Do not use gaffers tape as this often becomes detached during transport. You are responsible for transport damages that result in improper wrapping. Best if you use the original padding and box, then wrap up the device as it was when you received it.

Fill out the RMA form on your computer. Print it out, sign it and put it INSIDE the box. We reserve the right to refuse working on devices which come with no error description.

IMPORTANT: When sending in your device from outside the EU

All packages must have a proforma invoice stuck on the OUTSIDE of the box. This is important for the customs duty. The contents of the parcel must be named and described exactly on the invoice, with declaration of the date of purchase and condition of the unit.

We would recommend to describe your device as defective and mark the contents of the parcel at a total value of 25€ or less. Otherwise, there will be extra fees (tax) from customs duties which we must pass onto you. No tax will be charged for goods with a value less than 25 €. Keep in mind that in case the parcel gets lost, the insurance of the post service (if applicable) will only refund the value marked in the declaration.

If the above points are not considered, please be aware that we must charge you the extra costs which arise through customs duty for storage and the additional handling etc. This would be an amount between 60 – 100 Euro.

Where can I find the download section and the manuals?2023-09-27T17:17:14+02:00

At the end of the FAQ list you will find the download links for this product.

How can I update my Quantum/Iridium?2023-09-27T17:05:57+02:00

After you have logged into your “myWaldorf” account, you will find a link “myHardware” below the “licence keys”. There you will find updates, init files and much more.

Are the outputs from my device balanced or unbalanced?2022-12-02T17:03:24+01:00

This device has unbalanced outputs. We recommend using it with unbalanced cables.

My device isn’t recognized via USB.2023-09-27T17:14:32+02:00

Make sure that your device is connected to your computer directly and not through a hub.

Use the rear USB ports of your computer, not the front USB ports.

Disconnect all other USB devices from your computer which aren’t needed at the moment.

Change the USB cable or try from a different computer.

On Mac: Click on About this Mac in the Apple menu. Select System Report. Go to the Hardware dropdown menu on the left and unfold it. Select USB. Check if your device is listed there.

On Windows: Press the Win key+R. Enter devmgmt.msc and press OK. Check if your device is listed there. If it shows up as an “Unknown Device” and if there’s a black and yellow warning sign, deinstall the driver. Then unplug the instrument, reboot your machine and plug it back in.

How can I update the Panel Firmware?2022-12-04T17:11:03+01:00

The panel firmware isn’t updated automatically after an OS update and has to be updated manually after the installation of a new OS version.

Press Global -> System -> Flash Panel

Afterwards the new flash panel software will be installed. Keep following the instructions on the display.

IMPORTANT: Don’t turn your device off or unplug it from the power socket while the panel firmware is updated!

Which SD card can I use?2023-09-27T17:08:44+02:00

In general, you can use any commercially available SD card.

It should be formatted FAT32 or exFAT, which is standard when you buy a card. Special certifications (high speed cards – SDXC) for increased speed are not necessary and are more likely leading to misbehavior. A simple inexpensive SDHC card is usually quite sufficient.

However, we do not recommend using an SD card for storage purposes. The USB interface is much better suited, as it is more reliable and faster.  An SD card is only needed when restoring the factory settings (full init). In this case, an SD card and a USB device are required.  Of course, it can be practical to use an SD card if a keyboard or other USB controller is already connected to the USB host interface.

Since we have not tested all SD cards and the market is quite large, it is difficult to give a comprehensive recommendation.

How can I import and export patches?2023-09-27T16:59:54+02:00

Import: Copy the patches onto an SD card. Copy the patches in a way that all patches from one bank are within one folder on the card.
If you have bought a sound set, copy the entire directory with the sounds to the card. If there is a subfolder with samples, copy the entire directory so that the file structure is kept.

On your device, press Load>Actions>Import. Navigate to the card and mark the folder which contains the patches you want to import. Now the device asks where these files should be saved. Enter the number of the first slot into which the files should be imported. Press Import. The device now automatically imports all patches from the selected folder.
If OS 2.0 or higher is installed, the samples from the sub folder will be imported automatically as well and you can also use an USB stick instead of the card.

When you import an entire folder, all patches will be inserted into the slots in alphabetic order. Gaps between patches will be omitted and everything will be imported in one block.

Export: Please go to Load>Actions>Export. Here, you can select and export your patches.

From Version 2.0 and later, samples that belong to a patch will be exported automatically with the patch.

How can I contol parameters through MIDI CC?2023-09-27T16:59:06+02:00

Turn a knob on the front panel or tap on the corresponding rectangle on the screen with the parameter name you want to control. In the context menu that appears afterwards, press MIDI Learn CC.

Move your external control or tap the field and enter the CC number. Now the device will change the value upon incoming CC messages.

To control volume, press Layer. Tap onto the Vol rectangle in the upper left corner. Assign your CC as described above.

You can also go to Global>MIDI>Mappings and assign your CCs there.

Note that the assignment is valid globally for all patches. Make sure that you’re sending the CCs on the correct MIDI channel so that you change the values on the correct layer.

This device does not react to Program Change Messages!2023-09-27T16:55:19+02:00

You will have to use the Favorites list in order to get the Prog CH working.

Load a patch that you want to call up later. Go to a screen that is not Load/Save – for example, go to the Osc1 page.

Press on the Perform button or the central value encoder. This opens up the Favorites screen. Tap and hold an empty field to insert your current patch onto one of those fields. You can also use the Favorites function on the Load screen.

This device uses only to the entries in the Favorites lis when Prog CH messages are used. As soon as you have put the most needed patches there, you can call them up by MIDI.

How do I use gate in and set 1 Volt per Octave pitch control from my modular into Iridium?2023-11-28T15:49:03+01:00

Select the chosen CV Input in the Mod Matrix as source and Pitch as destination. Set Amount to 100%.
Go to Global>Settings>CV and set CV scale to about 2V (or less) which corresponds to the 2 Oct pitch amplitude in the mod matrix.
Each CV input can be individually scaled.
Press the encoder once or twice to do fine adjustment.

Iridium Desktop
For the function of the “Gate In” no special setting must be made. However, the arpeggiator (performance/autoplay) must be switched off. The red LED must not be on. Just press the button again until the LED is white. This is also the reason why an Init patch works with the gate and some other patches do not.

Iridium Keyboard

Go to Performance/Autoplay and select “off”.


The pitch bend and mod wheel do not behave as they should, how do I calibrate them correctly?2022-12-04T19:35:35+01:00

First of all, before you start, make sure the Mod wheel is at the lowest position and the pitch bend is in the middle position.

Go to Global>System>Calibrate>Wheels & AT.

Now move the pitch bend first up to the highest position, then let it snap back into the middle position. Now move it down to the lowest position. Repeat that five times. Make sure to push it all the way towards the upper and lower boundaries and don’t press or turn anything else on Quantum while you are doing it. Then move the mod wheel to the uppermost and lowermost position five times, again don’t press or turn anything else on while you are doing it

Afterwards, press more than five keys at the same time with high and low pressure to set the sensitivity for the aftertouch range.

Press Done when finished and then reboot Quantum. Now tap onto the VU meters in the lower left corner of the screen and switch to the MIDI Monitor. Check if everything works as it should. Pitch bend and mod wheel should not produce any messages unless they are being moved. If pitchbend, mod wheel and aftertouch are not working correctly, repeat the calibration process and follow the steps above exactly as mentioned.

How can I neutralize the effect of the pitch bend controller so that I can use the controller for other modulations?2022-12-04T19:47:01+01:00

Open the patch where you want to neutralize the pitch bend controller.

Add a modulation in the Mod Matrix:

Pitch Bend > Pitch. Set the Amount of this modulation to -70.60%. In order to get to this value, you will have to push the encoder for this value down to switch to Fine editing mode.

Now, you can turn the pitch bend wheel and the pitch will not change.

If the patch is set to a PB Range different than the default +12, you may either adjust the modulation value in the Mod Matrix or the PB range on the Osc1/2/3>Control tab.

When you’re done, save the patch to keep the changes.

This procedure has to be made in every patch where you want to apply this control.

How can I import patches from the DX7?2023-09-27T16:57:11+02:00

Go to Load>Actions>Import and select the .syx file on the card or USB stick. The device will now ask where to save the patches after the import and starts processing them.

Every DX7 patch will create an individual patch on the device. Settings will be imported to Osc1 Kernel.

Maybe the routing will be changed so that Osc1 bypasses the filters and goes directly into the VCA. This can be changed manually in Filters>Routing.

Note that this will only work with OS 2.0 or higher installed.

How can I use the effects and filters via the external audio input?2023-09-27T16:48:05+02:00

Under the following link you can download a PDF in which the most important settings are explained.

https://cloud.waldorfmusic.com/index.php/s/qH9faBGxPibofww


How can I play a split sound over an external Keyboard ?2024-03-26T15:39:23+01:00
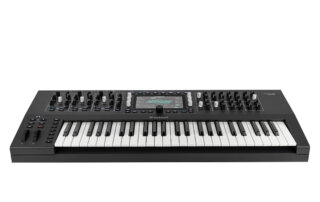
To play a split sound via an external keyboard connected to the USB host port, the function: Apply Split to MIDI
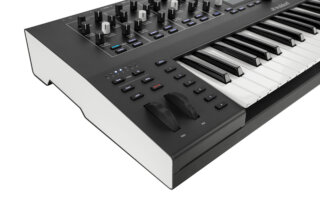
must be activated. This can be found under: Global/MIDI/Inputs

How can I reset my Quantum/Iridium to factory settings?2023-09-27T17:00:57+02:00

Please log in to your “myWaldorf” account. Here you will find all the necessary files and instructions under “my hardware”.

Which power supply can I use?2022-12-04T17:00:57+01:00

Please use only the provided power supply. If this didn’t come with your device, please contact your dealer.

The cable between the power supply and your power socket is a common “figure of eight” or C7 plug type. If you happen to have the EU version of the PSU but live outside the EU, you can just get the matching cable to connect it to your socket. The power supply is a wide-range type for every range and combination between 110-240V and 50-60Hz.

This device can’t be powered via USB.

I have mistyped an attribute for a patch and accidentally saved it. How can I correct that?2023-09-27T16:49:54+02:00

Create a new attribute with the correct spelling and assign it to the patch it belongs to. Make sure that no patch uses the attribute with the typo. On the next reboot, the mistyped attribute will be removed from the list.

What is the difference between Latch and Chord Mode?2022-12-04T19:56:06+01:00

In Latch Mode, a key is engaged when pressed and sustained until you hit the same key again, then the note will be released.

In Chord Mode, only the last note or chord will be held until you press the next key(s), then the previous notes will be released and the new note or chord will be sustained.

I want to play a sound that produces the same pitch over the entire keyboard. How do I do that?2022-12-04T20:59:02+01:00

Open the Mod Matrix and make three modulations: Keytrack -> Pitch or three times Keytrack -> Osc 1/2/3 pitch if you just want to do it for one of the oscillators. Two of the modulations should have -100% and one about -89%. Afterwards every key will produce the same pitch. To tune the base pitch use another modulation with Constant as the source.

I have connected an Expression Pedal to Quantum/Iridium Keyboard, but it doesn’t have any effect on anything.2022-12-04T20:18:04+01:00

The Expression Pedal must be assigned somewhere, otherwise it won’t have any effect. Go to the Mod Matrix and set a modulation with Pedal as a source and assign it to any destination you like.

If you want to control the volume with the pedal, set the pedal to zero. Create a modulation with Constant->Volume and adjust the amount into the negative area until the output level of Quantum is completely silent. Attention: Negative values for volume will also produce audible sound! You will have to hit the zero level exactly. When done, push the pedal to 100%. Set another modulation with Pedal->Volume. Slowly increase the amount until you can hear something. When the pedal is fully engaged, you can control the maximum loudness with the amount. Keep in mind while using this method, nothing will be audible when the pedal is not plugged in.

Or just use one modulation Pedal->Volume with a negative amount, then the volume gets softer as you press the pedal. In this way something will be audible as well when there is no pedal plugged in.

IMPORTANT: Remember to save the sound after the modulation has been set. The modulations are stored with the sound and have to be done individually for every sound.

Which footswitch and expression pedals can I use with my device?2022-12-04T20:23:17+01:00

Any sustain pedal with a 6,3mm jack that closes the contact when being pressed should work. Our recommendation is a Fatar/Studiologic VFP1/10. Only use a single pedal, dual pedals won’t work.

The pedal should be plugged in before the device is turned on. While the device is switched on and during booting, the pedal should not be pressed, otherwise its state will be inverted.

For the swell / continuous pedal, we recommend using a Fatar/Studiologic VP/27. Otherwise, other 10k maximum resistance expression/swell pedals with linear scale should work, too.

For both sustain and continuous, pedals compatible with Fatar, Roland, Moog, Kurzweil, M-Audio should be working as well.

The Korg/Yamaha models may not work though.

Does my device send audio via its USB connection?2023-09-27T17:12:30+02:00

No, this device only sends and receives MIDI via USB. Transferring audio via USB isn’t possible.

The device has crashed!2023-09-27T16:54:14+02:00

First, please update the OS. We often release a new firmware with new features and we definetly recommend to do an update. The procedure takes less than a minute. You find the latest updates in your “myWaldorf” account under “myHardware”.

The OS is really stable so crashes rarely occur. If the device crashes anyway, please generate a system logfile by pressing Global>System>Support Log. Include your name and crash date in the file name when saving. Send us your file and we will have a look at your issue.

The line output signal level on my device is very low or distorted or noisy.2023-09-27T17:43:14+02:00

Make sure that the necessary cables are connected properly and that the introduced signals are the correct type. Also, the device must be powered correctly.

If that and the other hints described on the FAQs do not help, please contact your dealer. In case your device is out of warranty, please use the support form at the bottom page.

I need spare parts for my device, where can I get them?2023-09-27T17:11:07+02:00

In the shop you will find a detailed overview. However, ordering and shipping is only possible in Europe.

I think I have to send my device in, how do I proceed? What do I have to do when I send my unit to Waldorf from outside the European Union?2023-09-27T17:10:04+02:00

First, make sure you’ve tried all the procedures above that are related to your issue.

If nothing helps and your device is still covered by warranty, please contact the retailer where this device has been bought.

All our devices come with 2 years of warranty. Depending on local law, some retailers only cover 1 year of warranty service. If your device has been bought more than one but less than two years ago, and your dealer refuses to do a warranty service repair, please contact the distributor for your area. You will find a list of them here: https://waldorfmusic.com/en/international-distributors

If your device is out of warranty, please, use the button in the upper right corner. Please, give a precise description of the error. If it’s really necessary to send in your unit, we will issue an RMA form.

Wrap up your device safely. Ensure that it’s padded at least 5cm/2inches in ALL directions all around. Use a sturdy cardboard box and parcel tape. Do not use gaffers tape as this often becomes detached during transport. You are responsible for transport damages that result in improper wrapping. Best if you use the original padding and box, then wrap up the device as it was when you received it.

Fill out the RMA form on your computer. Print it out, sign it and put it INSIDE the box. We reserve the right to refuse working on devices which come with no error description.

IMPORTANT: When sending in your device from outside the EU

All packages must have a proforma invoice stuck on the OUTSIDE of the box. This is important for the customs duty. The contents of the parcel must be named and described exactly on the invoice, with declaration of the date of purchase and condition of the unit.

We would recommend to describe your device as defective and mark the contents of the parcel at a total value of 25€ or less. Otherwise, there will be extra fees (tax) from customs duties which we must pass onto you. No tax will be charged for goods with a value less than 25 €. Keep in mind that in case the parcel gets lost, the insurance of the post service (if applicable) will only refund the value marked in the declaration.

If the above points are not considered, please be aware that we must charge you the extra costs which arise through customs duty for storage and the additional handling etc. This would be an amount between 60 – 100 Euro.

Go to Top